...
Welcome to your new QikServe Online Ordering venue! Once you have received your dashboard invitation email (please check your spam/junk folder, the link expires in 48hrs7 days) follow the steps outlined below to setup your venue and start taking orders today. This guide is in addition to our training calls which you and any colleagues are welcome to join - see the info box below.
...
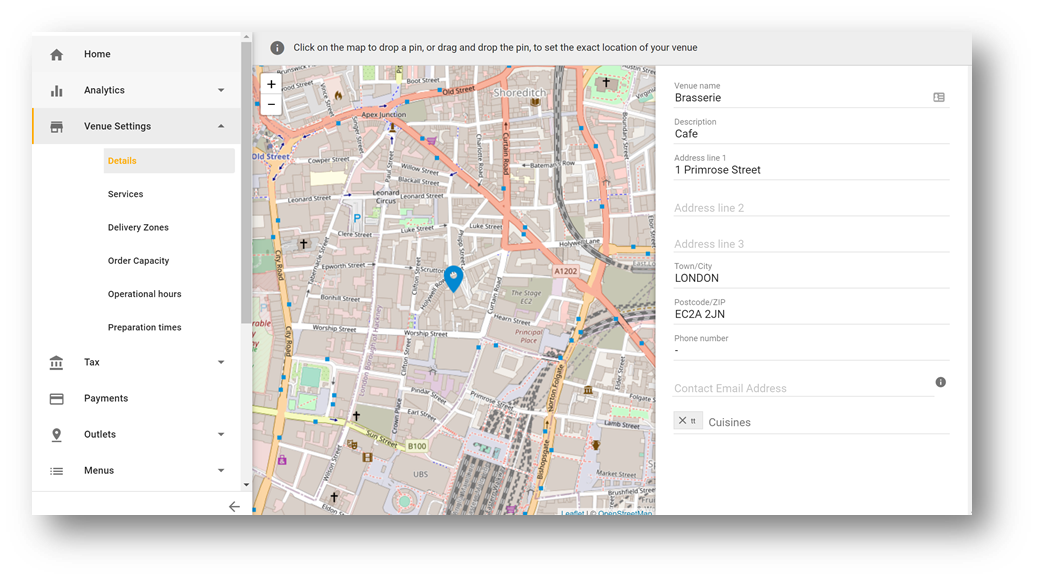
Venue Settings → Details: Add your address and contact details, and make sure that the blue marker pin on the map correctly shows your address (you can manually move the pin if needed). These The details are visible to your customers on the Contact section of the web ordering page, and the location is used to calculate delivery distances and fees, so it’s important they are correct!
Tip: If you can’t save your changes, look for the text box highlighted in red and fill this in too.
Venue Settings → Services: We offer 3 types of services which you can toggle on and off as highlighted on the image below:


Collection - customer orders ahead, then collects their order at a specific time
Delivery - customer orders for delivery to an address at a specific time
Offering delivery? Make sure to set a delivery zone
To Seat - designed to be used as an alternative to regular table service - customers can sit down and order to their table or seat
Now set the Order Capacities per service
And then apply these to your Opening and Service Hours
Set your Preparation Times
...
We work with multiple payment gateways and to get an up-to-date list of the options please contact us as at support@qikserve.com.
You are able to configure Stripe as a payment gateway from the Dashboard, and it takes roughly 15 minutes to create an account and connect it to your QikServe Dashboard. To do so, simply enable Stripe using the toggle on the top-right of the Payments section on your Dashboard, click the “connect to “Go To Stripe” button and follow the steps.
...
Simply add the name, email and select the right permissions, then click Send Invite. The user will receive a link allowing them to set up their new account. This link expires in 2 7 days so you may have to resend it if they miss this window. Make sure to have them check the their spam/junk folder, just in case.
...
The orders screen
...
At this point, you should be ready to start taking orders! Before you do that however, it’s always a good idea to make do a few test orders to make sure everything is working and looking as expected.
...
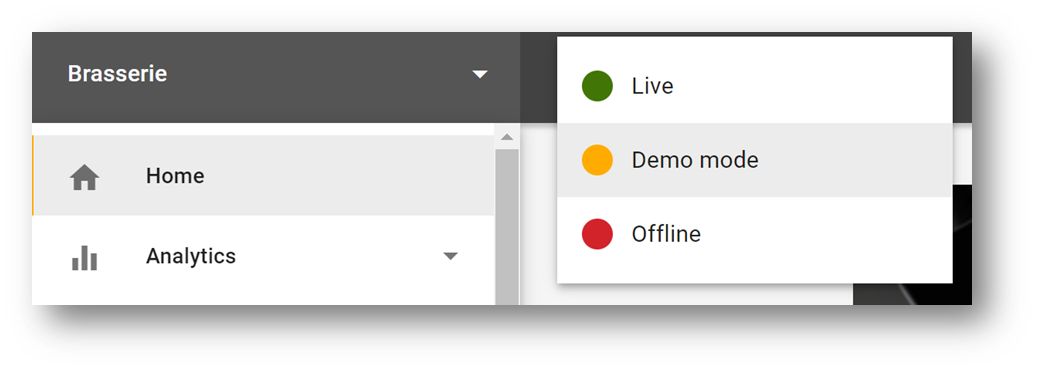
Set your venue to Demo Mode, using the dropdown on the top. The demo mode allows you to place and accept orders as normal - the only difference is that no payments will be processed.

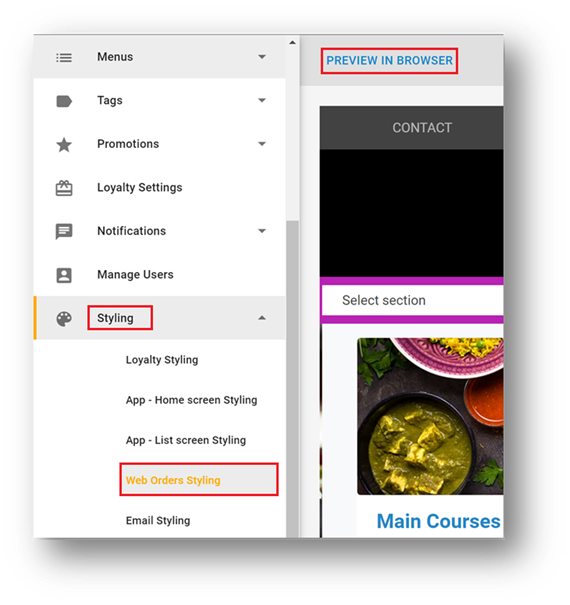
Open your public Web ordering page (the one your customers will see!) by going to Styling → Web Orders → Preview in Browser. The URL in the page that opens is what you will need to share with your customers when you are ready for them to see it.

From your public Online Ordering page, place some test orders; in demo mode, no payment will be taken, but you will be able to view the regular order journey.
From the customer’s side, you should see an order confirmation page, and you should receive the order confirmation email
From the venue side, you should be able to view and processed the order through the Orders page. See more on managing orders
Use the demo mode to experiment with any changes you might like to make, and to get comfortable with the overall functioning of the system before going to live. Once a venue is set to “Live”, demo mode will no longer be available.
...