| Note |
|---|
The options described in this article can vary for POS-integrated setups. For more information about integrated setups, contact support@qikserve.com |
Each menu can contain sections, items and modifiers.
...
| Info |
|---|
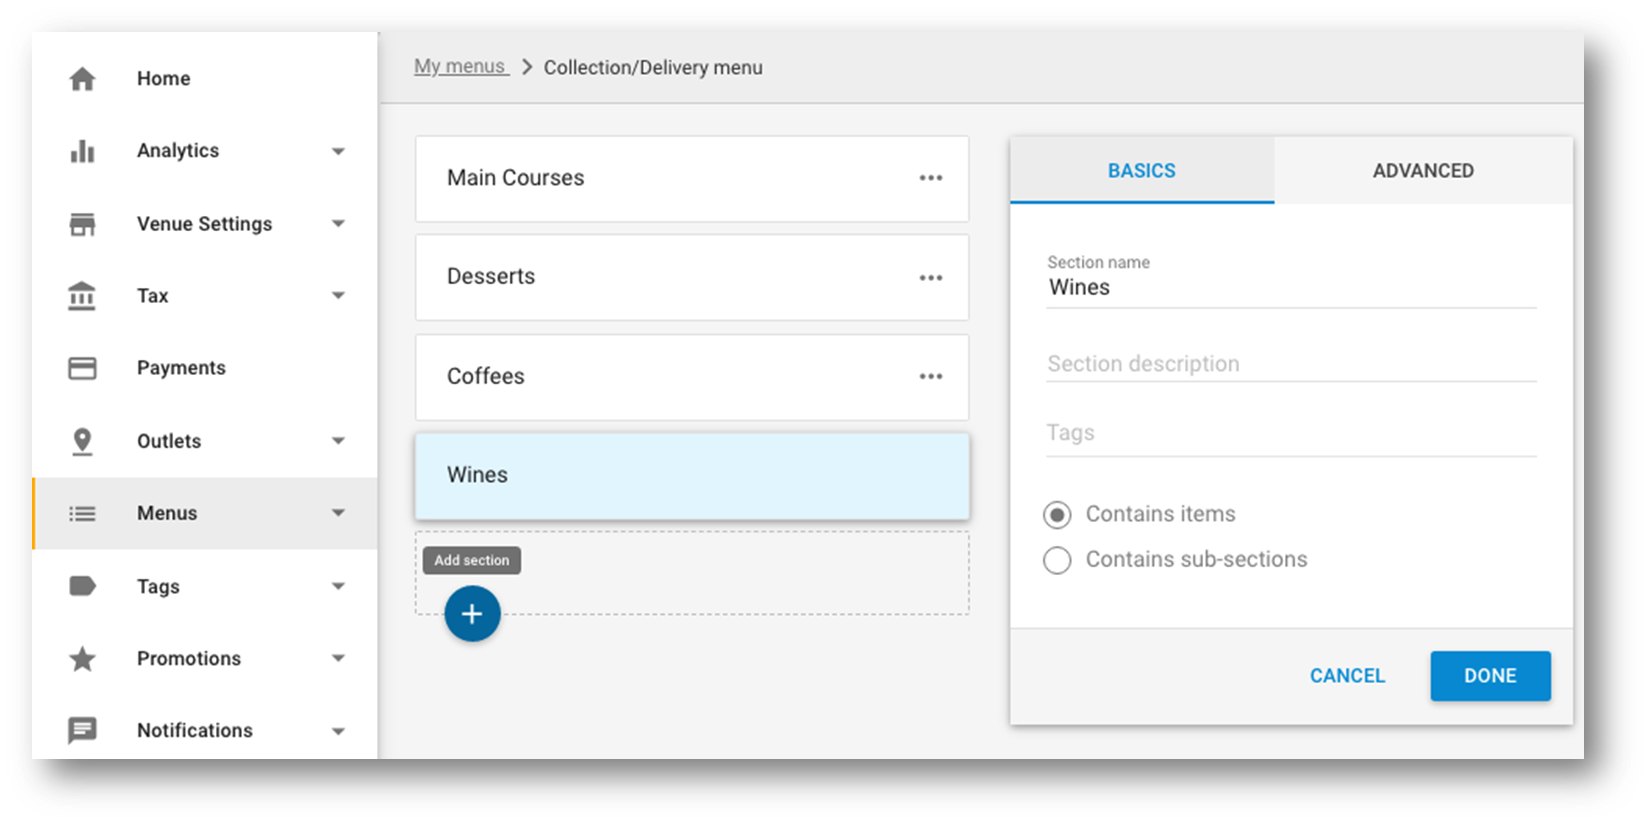
Each menu can contain multiple sections, which in turn can contain either items or subsections. If you would like to have the option of subsections please write in to Support@Qikserve.com and we can set this feature flag 'Nested Section' for you. |
...
| Table of Contents | ||
|---|---|---|
|
...
| Drawio | ||||||||||||||||||||||||||||||||
|---|---|---|---|---|---|---|---|---|---|---|---|---|---|---|---|---|---|---|---|---|---|---|---|---|---|---|---|---|---|---|---|---|
|
Create an Item
On the left hand toolbar, select 'Menus'
Click 'My menus'
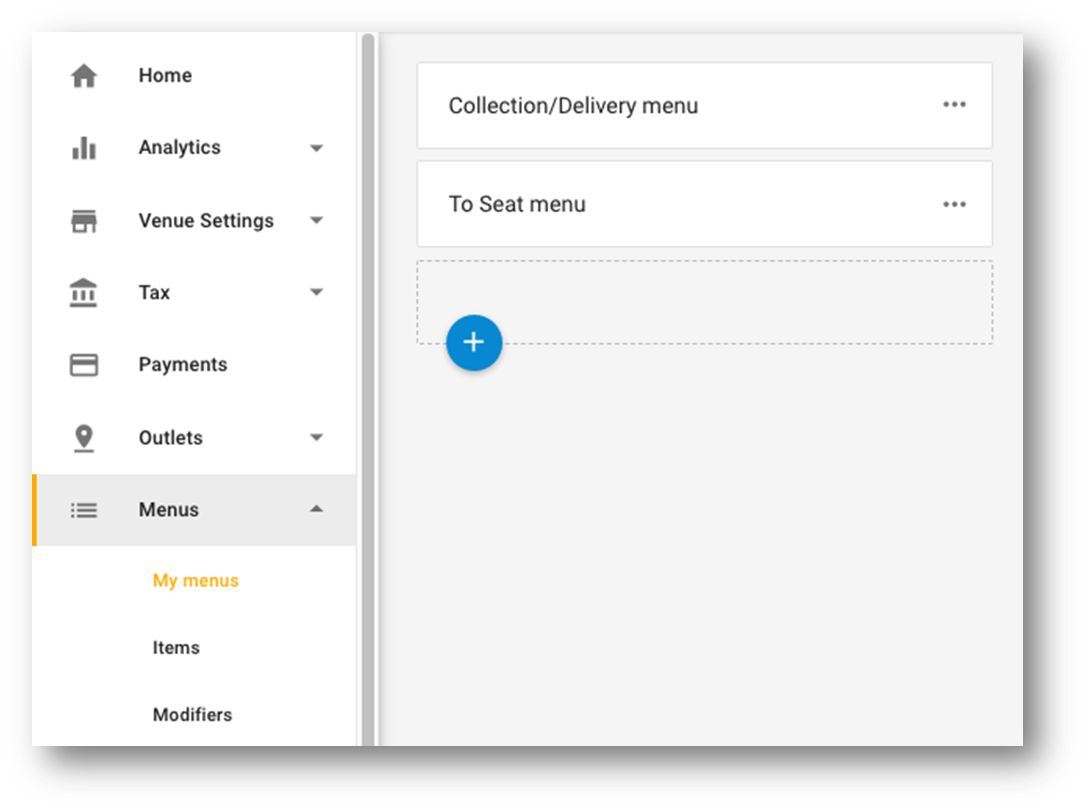
Click on the menu you'd like to add the item to, then subsequently, the relevant section. If you need to create a menu section, click the blue circle with the '+' (Add Section) and create your menu section
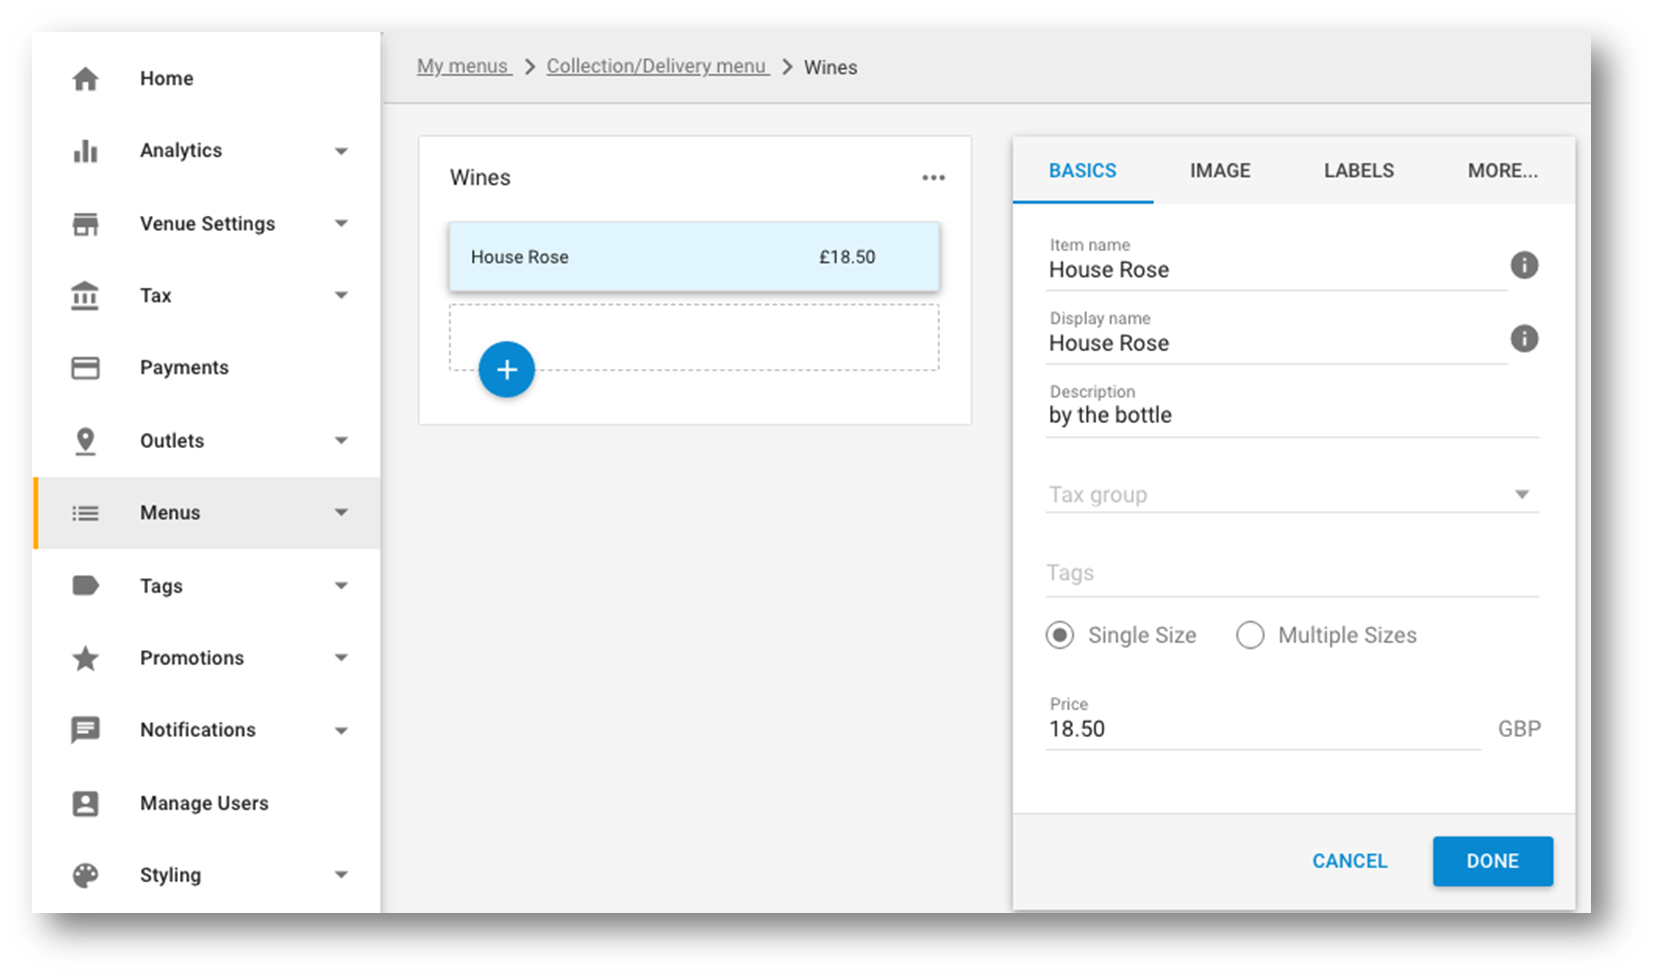
Within the relevant menu section, click the blue circle with the '+' (Add Item)
Click 'Create new item'
Input details about your new menu item and click Done when you are finished to save it. Each item needs an Item name and display name - the latter is what the customer will see. You can add an image or labels (allergen/spice level) or any individual settings for this one item in the tabs following on from basics
Set up modifiers
Go to the QikServe Dashboard (http://app.preoday.com )
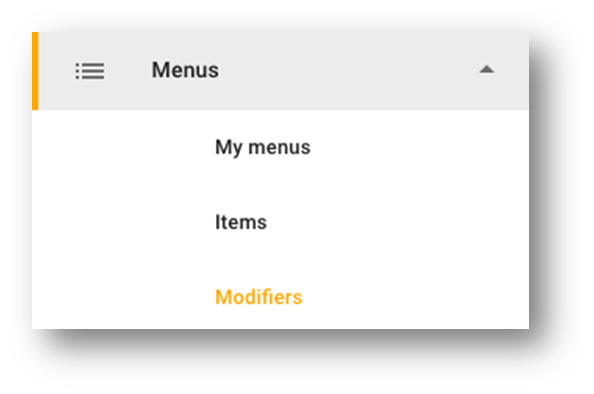
Select 'Menus' and then 'Modifiers'
Click the blue circle with the '+' inside it
...
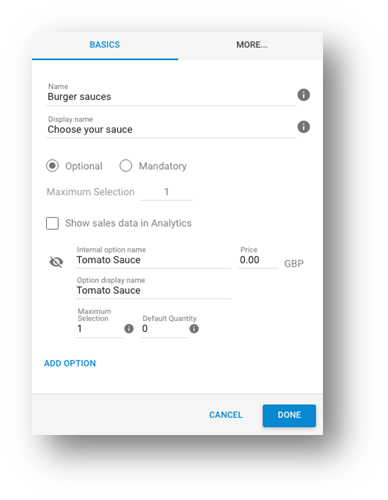
The display name is how the modifier will show to your customers. For example, 'Choose your sauce'
Select whether the modifier will be optional or mandatory. Mandatory modifiers will display first, followed by any optional modifiers if there are more than one modifier added to an item
The maximum selection decides how many options the customer can select per item
You can include the modifier items in your stock taking data allowing you to see which was the most popular over the course of a time period. If you are interested in this, tick the box to ‘Show sales data in analytics’, and then view the information in your Analytics at a later date
Enter your first modifier option into the box and give it a price. For example, 'tomato sauce'
To add multiple options, click on 'Add option', enter a name and give it a price
Click 'Done' to save
You can also set up Pre-select Modifier Options
Add a modifier to a menu section or specific items
To add a modifier to an item, click on 'Menus' and then 'My menus'
Click on a menu and subsequent section that you want to add a modifier to
Click on 'Add Modifiers' on the right hand side
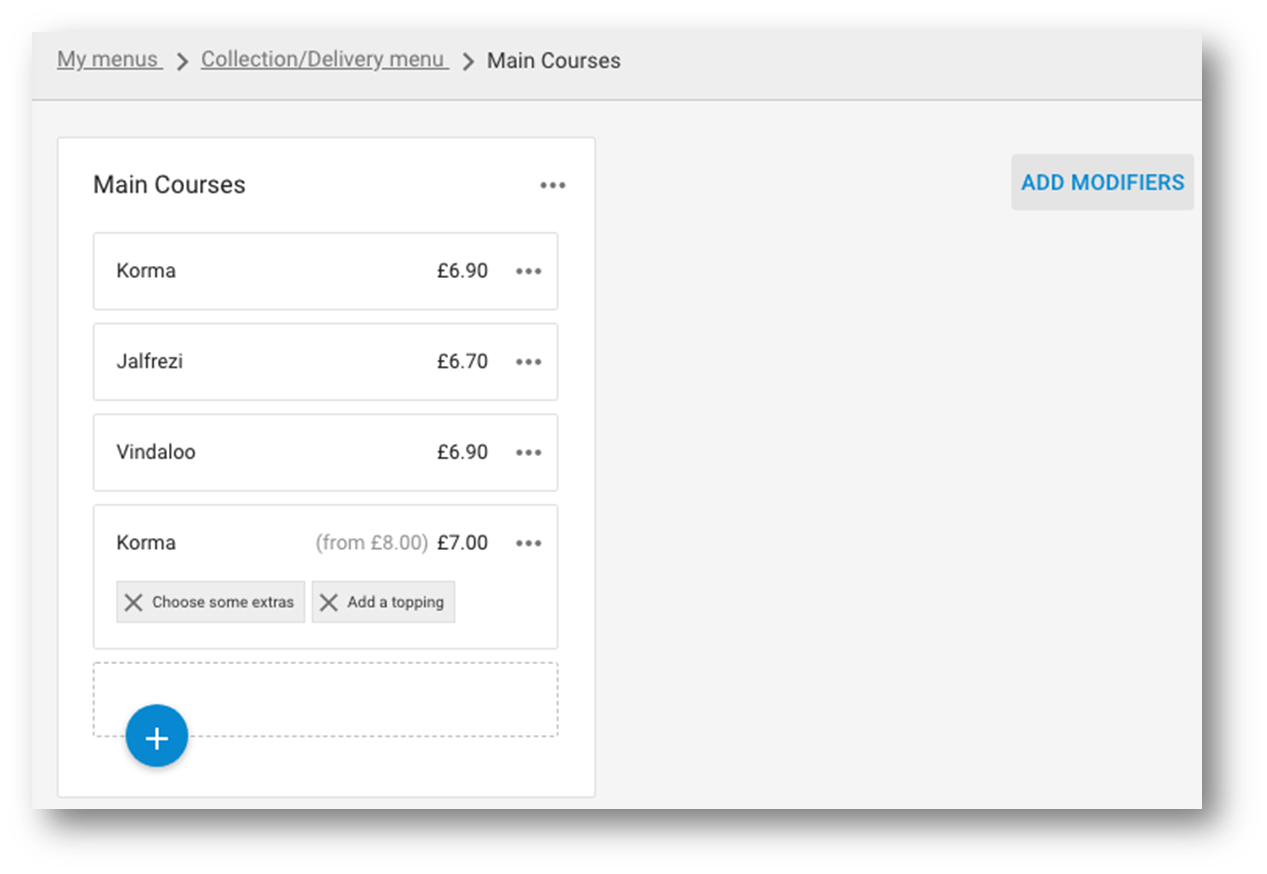
Find the modifier you would like to add, then drag and drop the modifier with your mouse on to the item you want it added to. You can also add it to a menu section from here, so that all items in the menu section will have the modifier applied
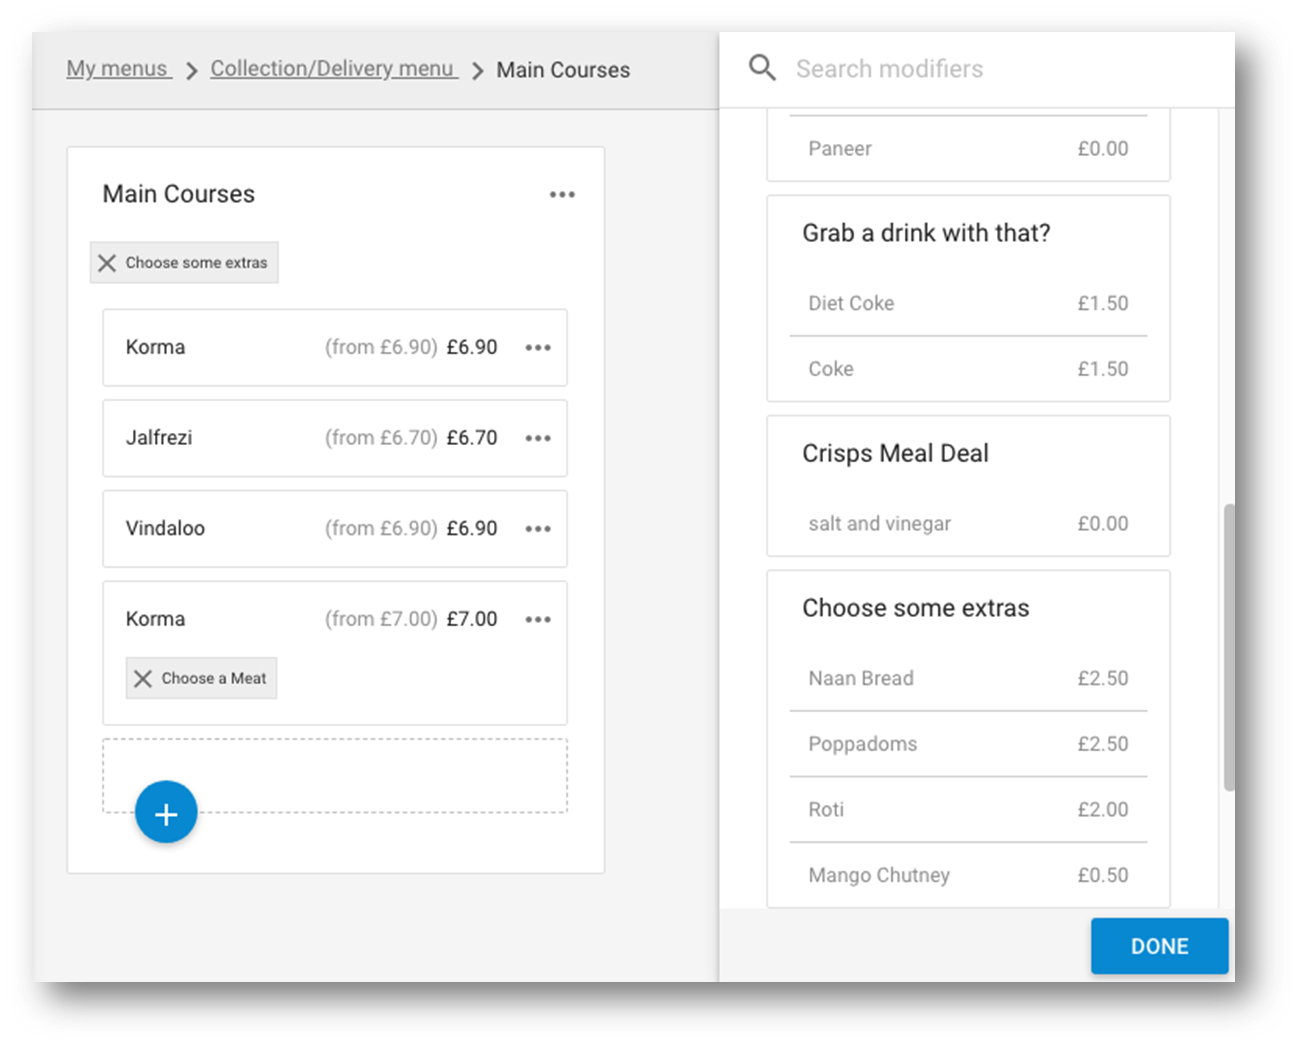
Click 'Done' to close the modifiers pop up window
Tips & Tricks
The easiest way to set up a “bundle” type promotion (e.g. 3 items for £10) is by using modifiers. Simply create a new item, for the total value of the promotion (e.g. £10) and then add the various options available as modifiers!
...