...
Hotline requires that you have a Global Dashboard which is an ‘umbrella’ Dashboard if you have more than one venue. Hotline is managed from the Global Dashboard, so if you haven’t got one you will be set up with one.
...
| Info |
|---|
To carry out any of the tasks listed below, first sign into your Global Dashboard. It is distinguished from your individual dashboards by the globe symbol outlined below |
...
...
| Table of Contents |
|---|
Creating a new Customer
Login into your Global Dashboard at app.preoday.com
On the left hand toolbar at the very bottom, select Customers


On the right hand side of the dashboard, select Create New Customer


Enter the customer details into the box that appears on the right, then press Done
Once you have created a customer, their details will be saved for any future orders they may place by phone
The customer will be sent an email from welcome@preoday.com with the subject title: ‘Welcome’‘Welcome’. Here they can finish the process of creating an account for themselves by entering a password
Continue on the steps below
...
Login to your Global Dashboard
On the left hand toolbar, select Customers
On the right hand side of the dashboard, search for an existing customer in the bar at the top of the screen (the customer must have been created already - see previous steps)

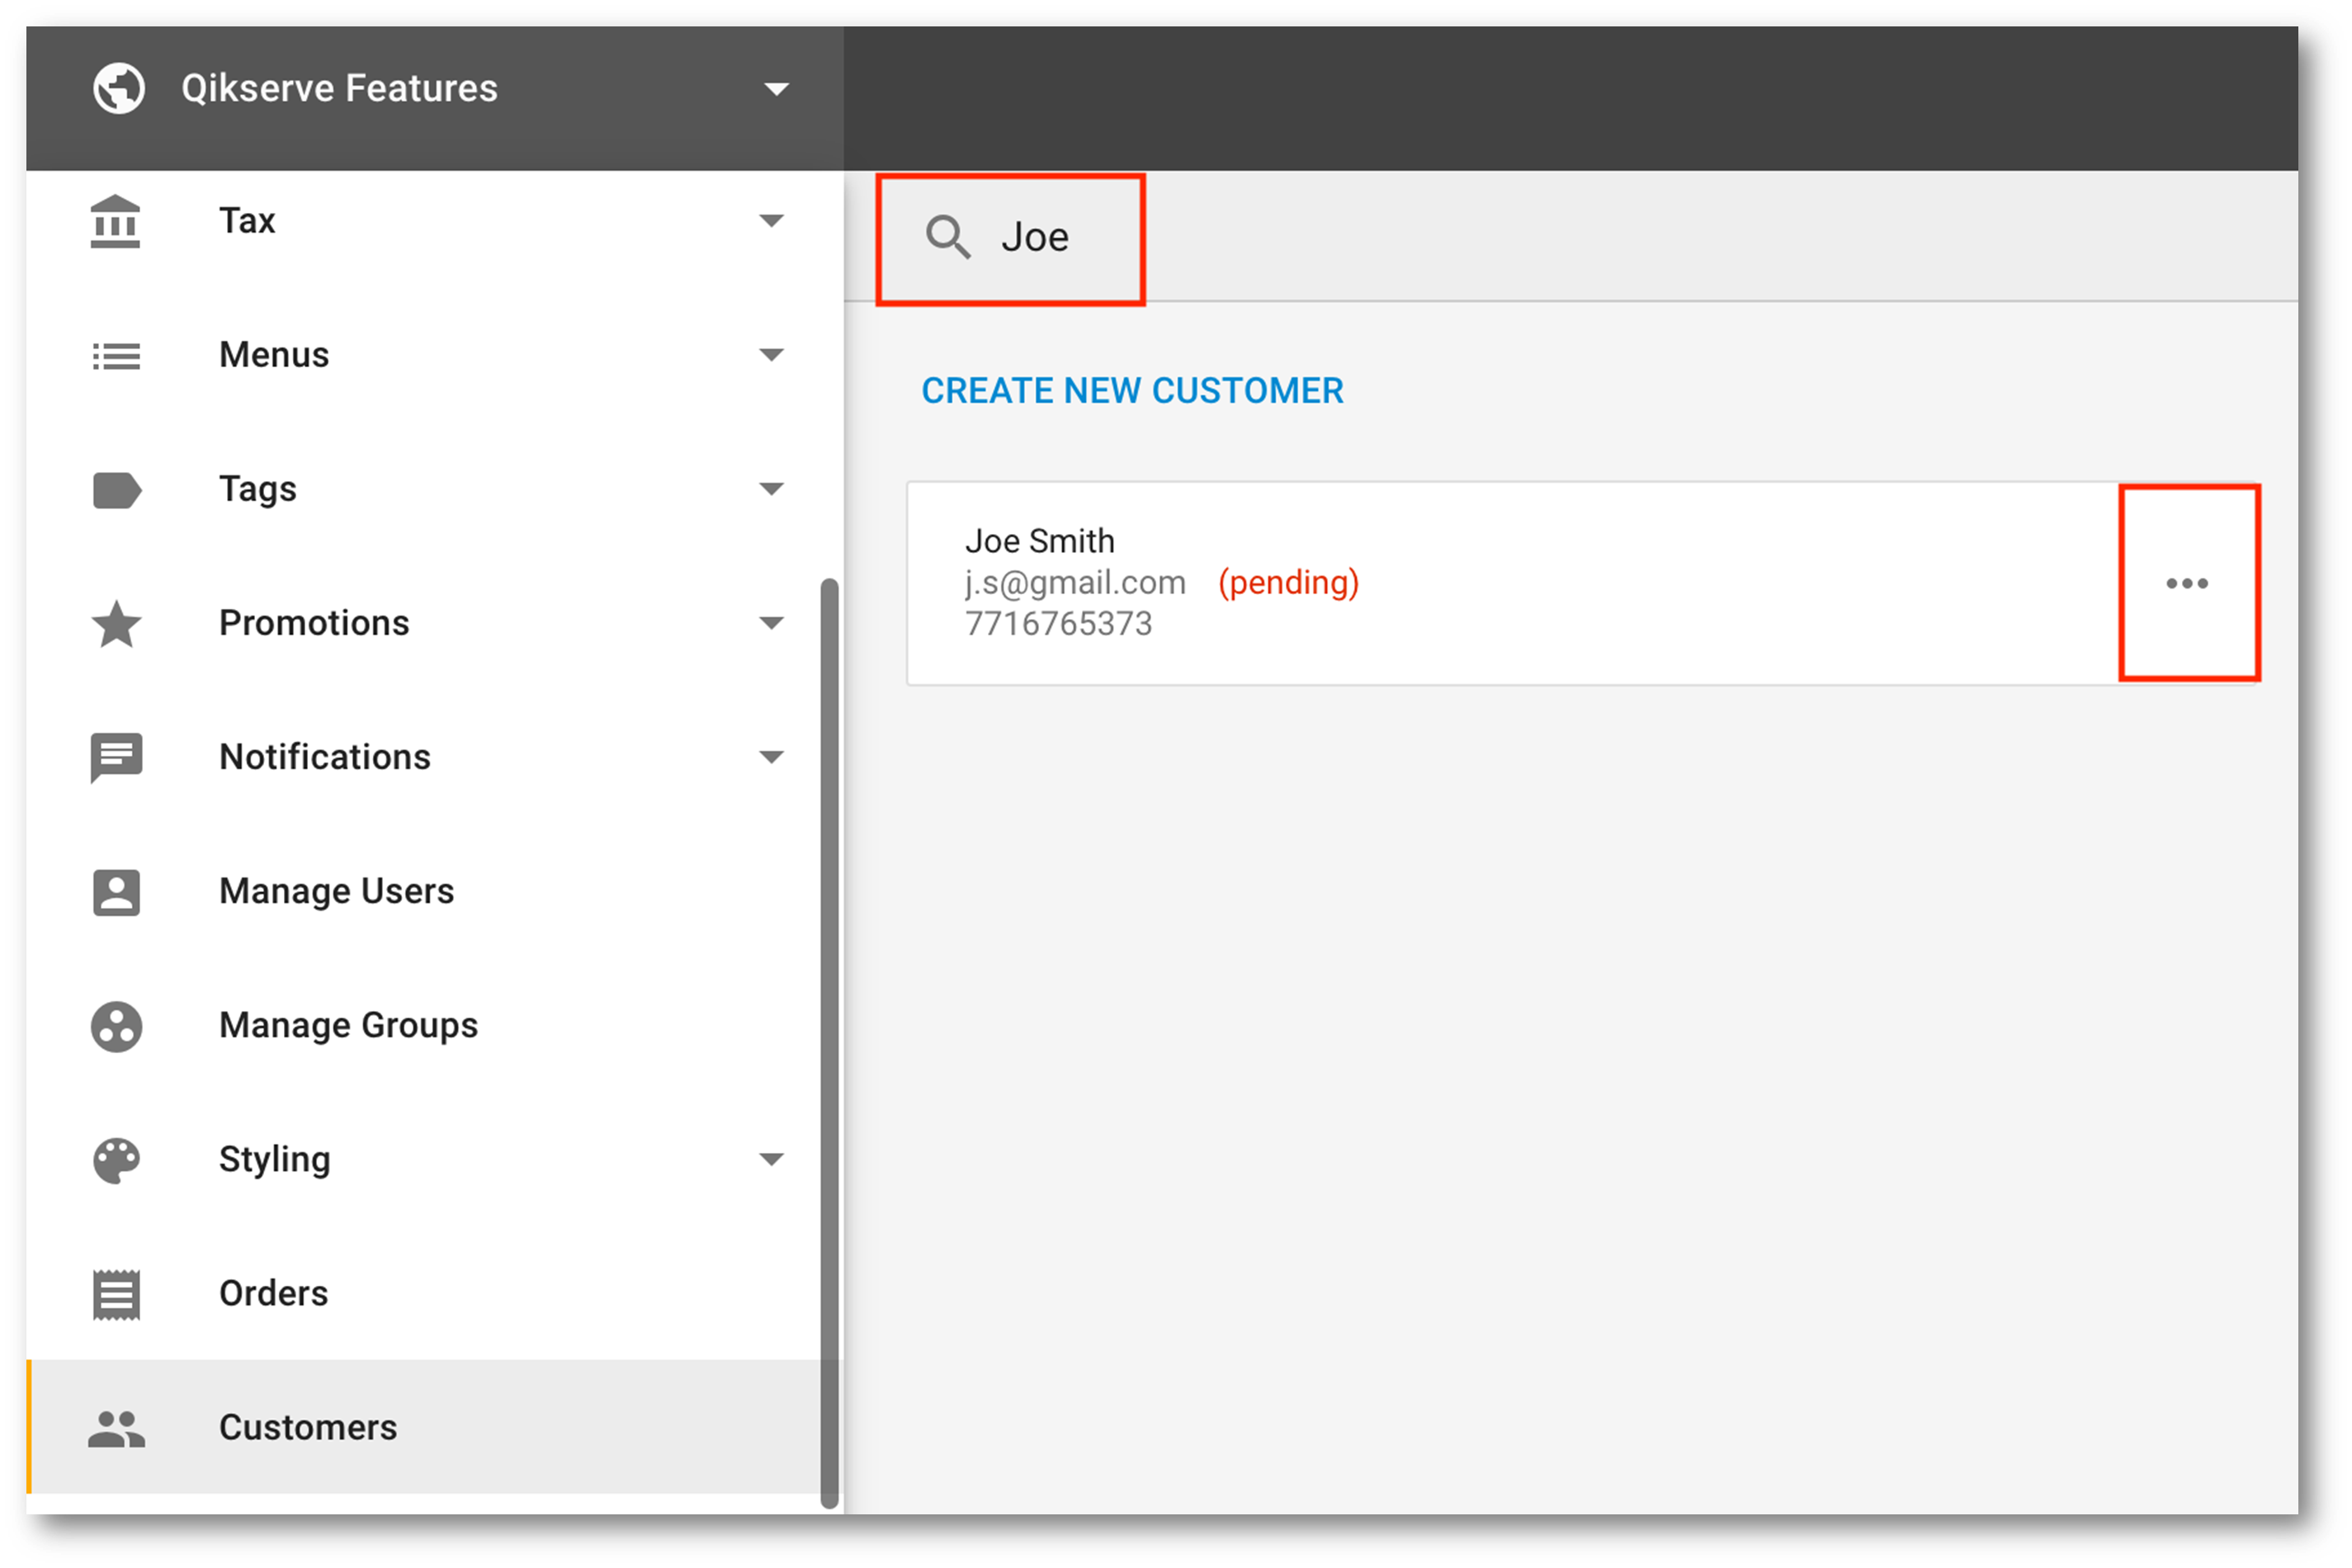
Once you have located the relevant customer, hover your mouse over the three dots at the top right of their customer details box
Four option icons will be displayed. By selecting the shopping basket icon, you will be redirected to the ordering portal, where you can take the customers order

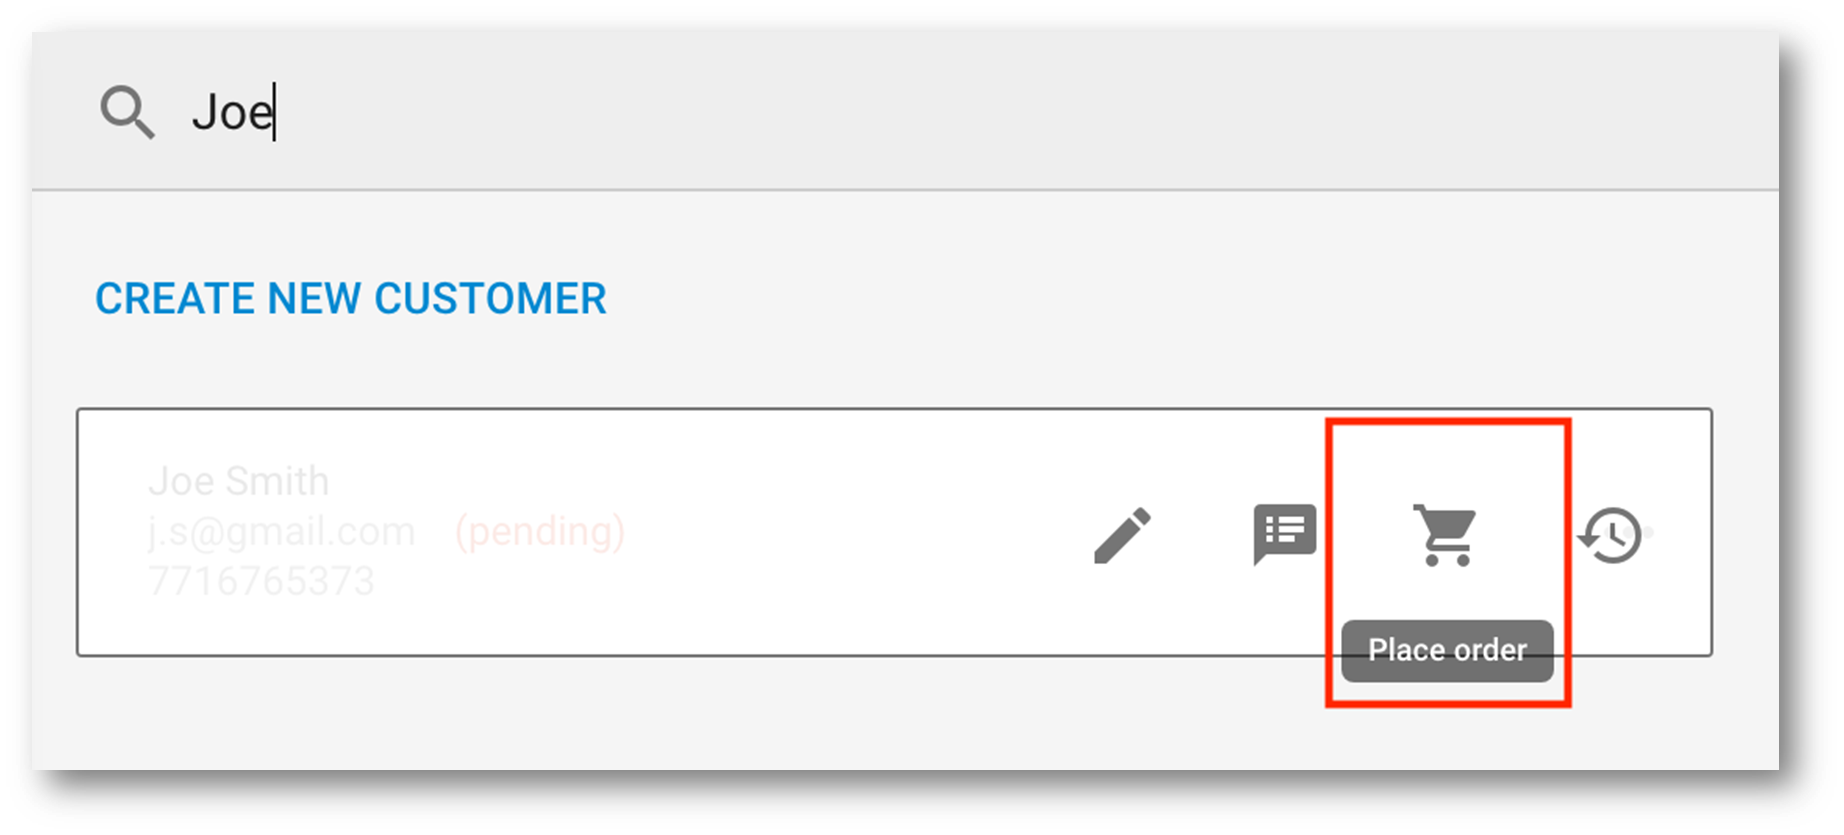
The other option icons shown above allow you to edit the customers details, add customer notes, and view their order history.
When on the ordering portal follow the journey as a customer would
At Checkout you will need to enter the customer’s card payment details if your venue supports card payments. You can also add any Special Instructions as normal
Click Place My Order
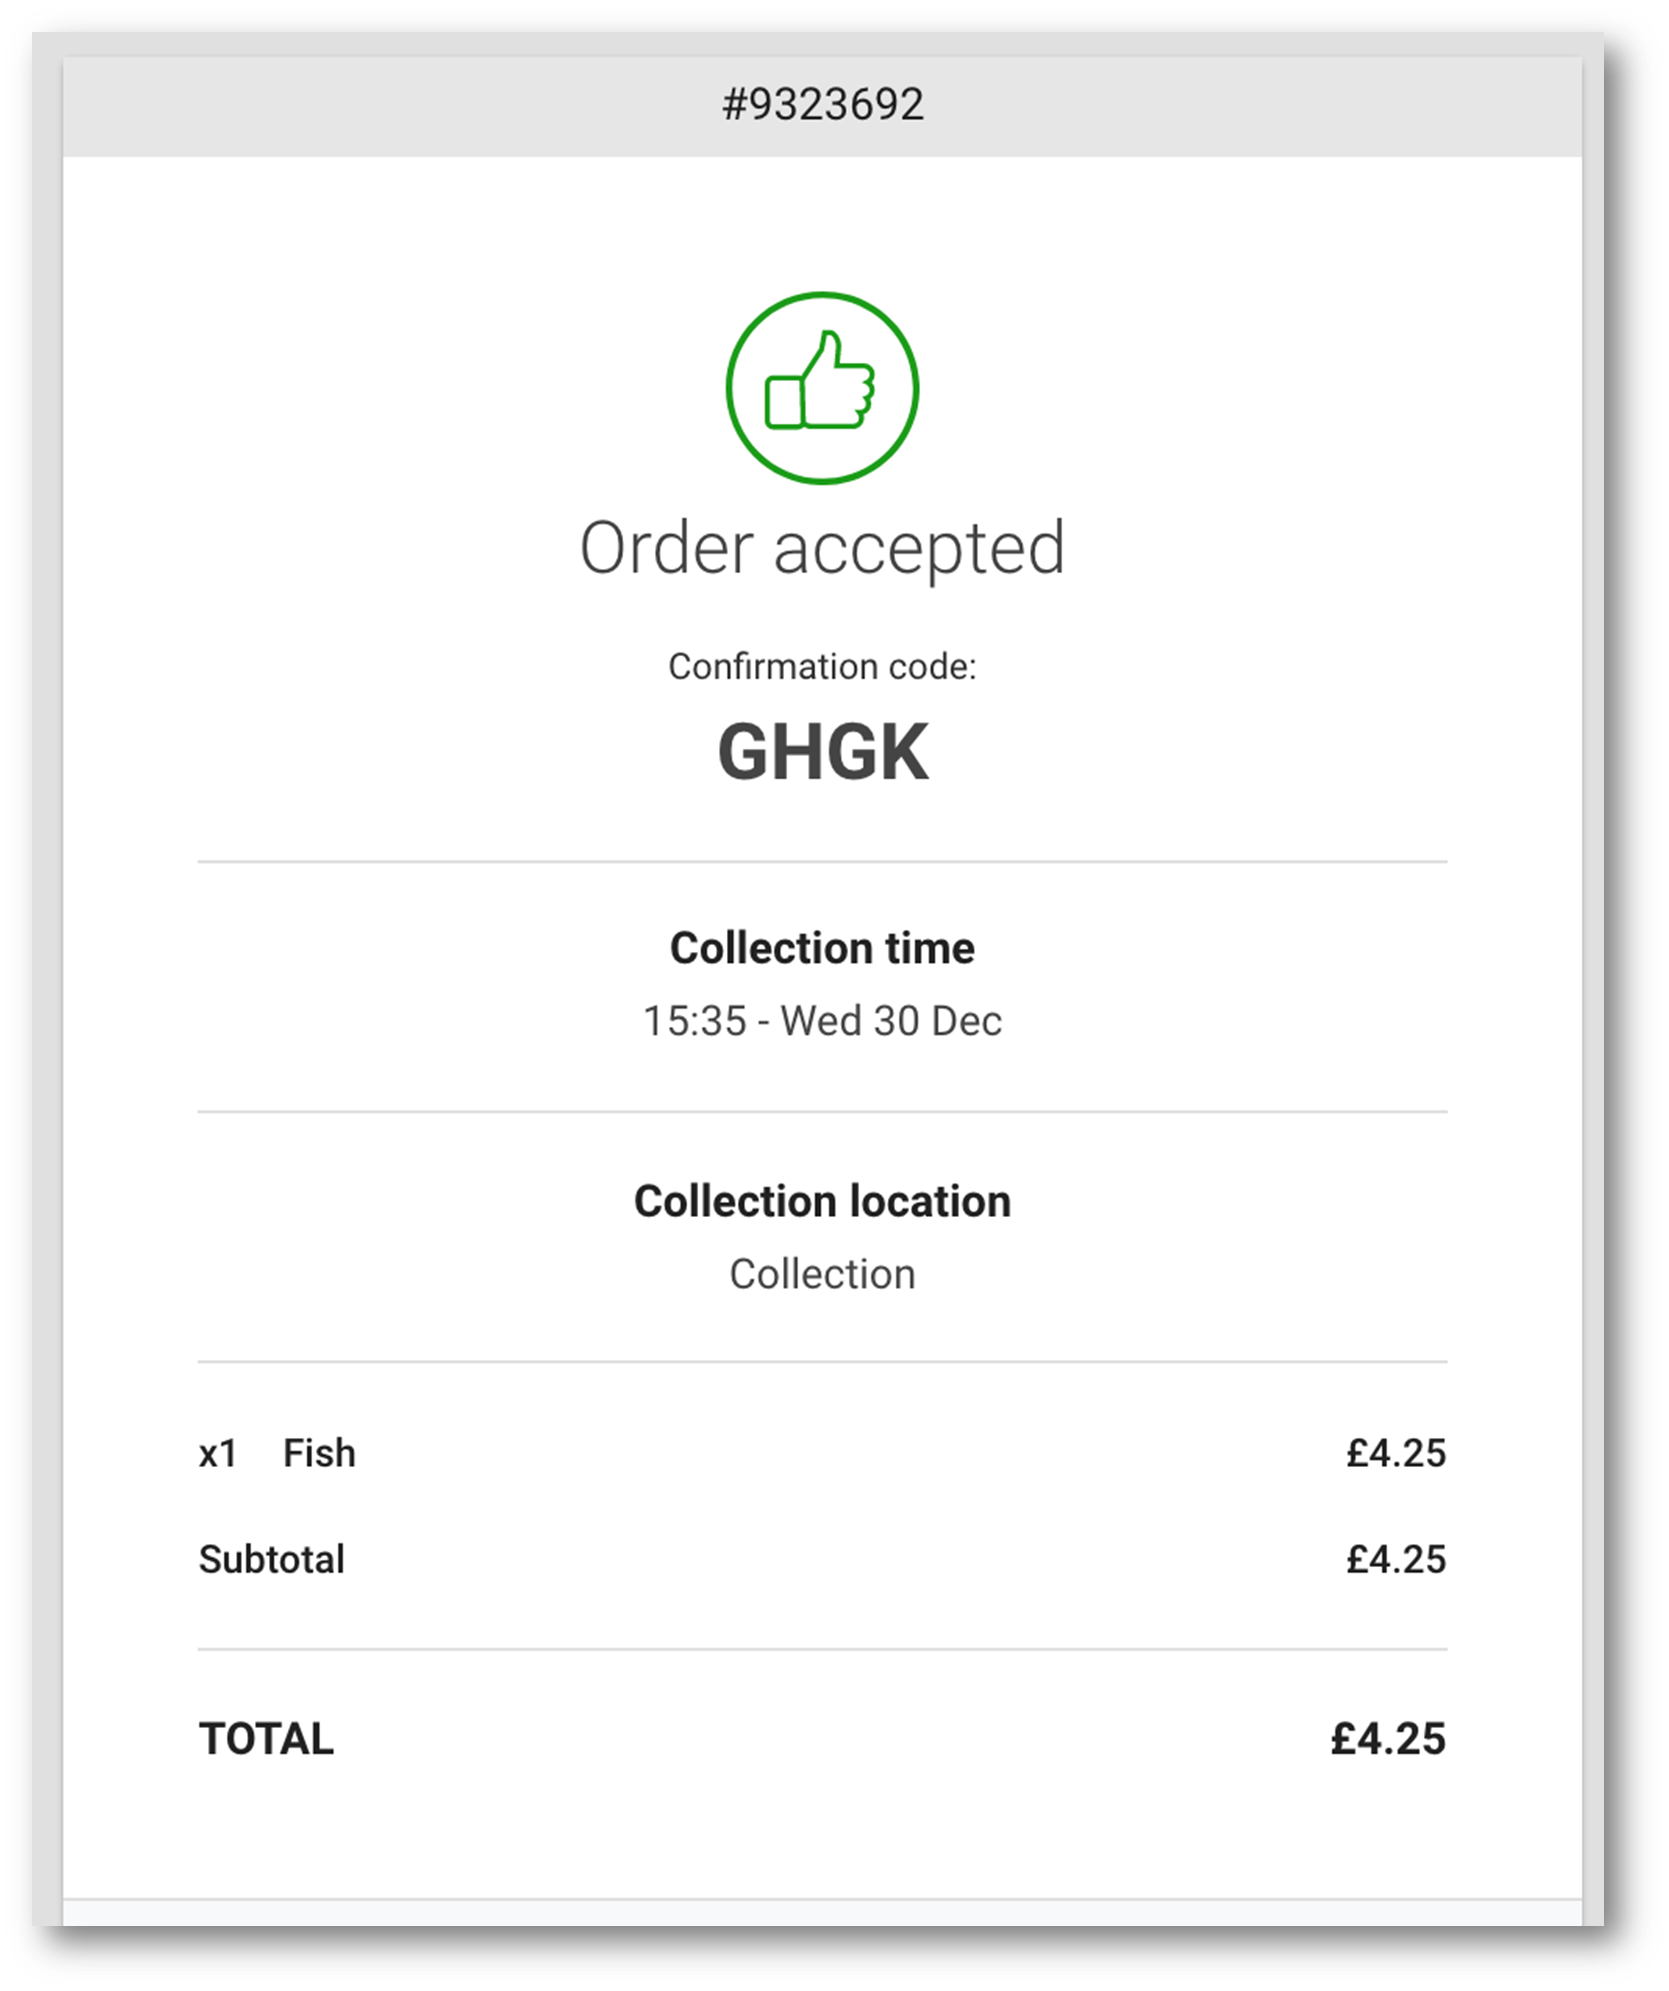
If you see the confirmation page then the order is successful. The customer will get an email confirming the order and the venue will get the order to their Order Management page.

...
| Related Labels |
|---|
...