...
Go to your QikServe Dashboard at app.preoday.com
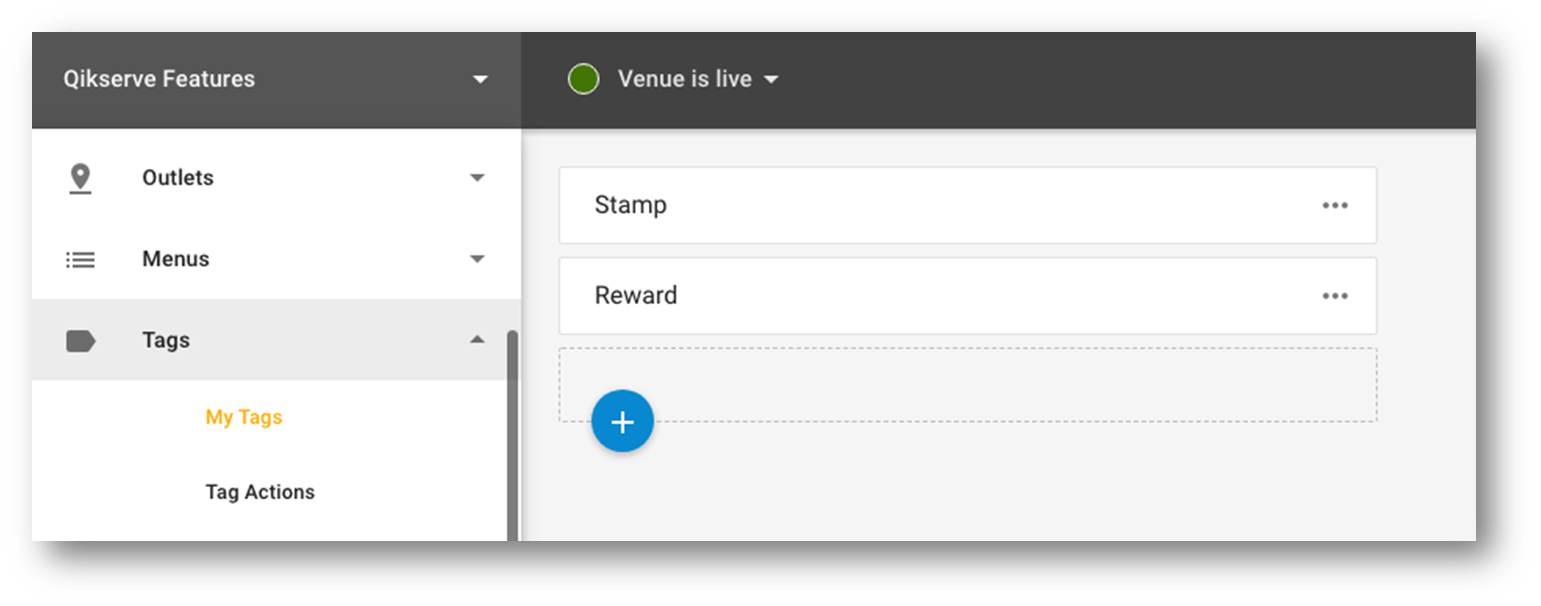
Navigate to Tags > My Tags
Create one tag called 'Stamp' and one tag called 'Reward'
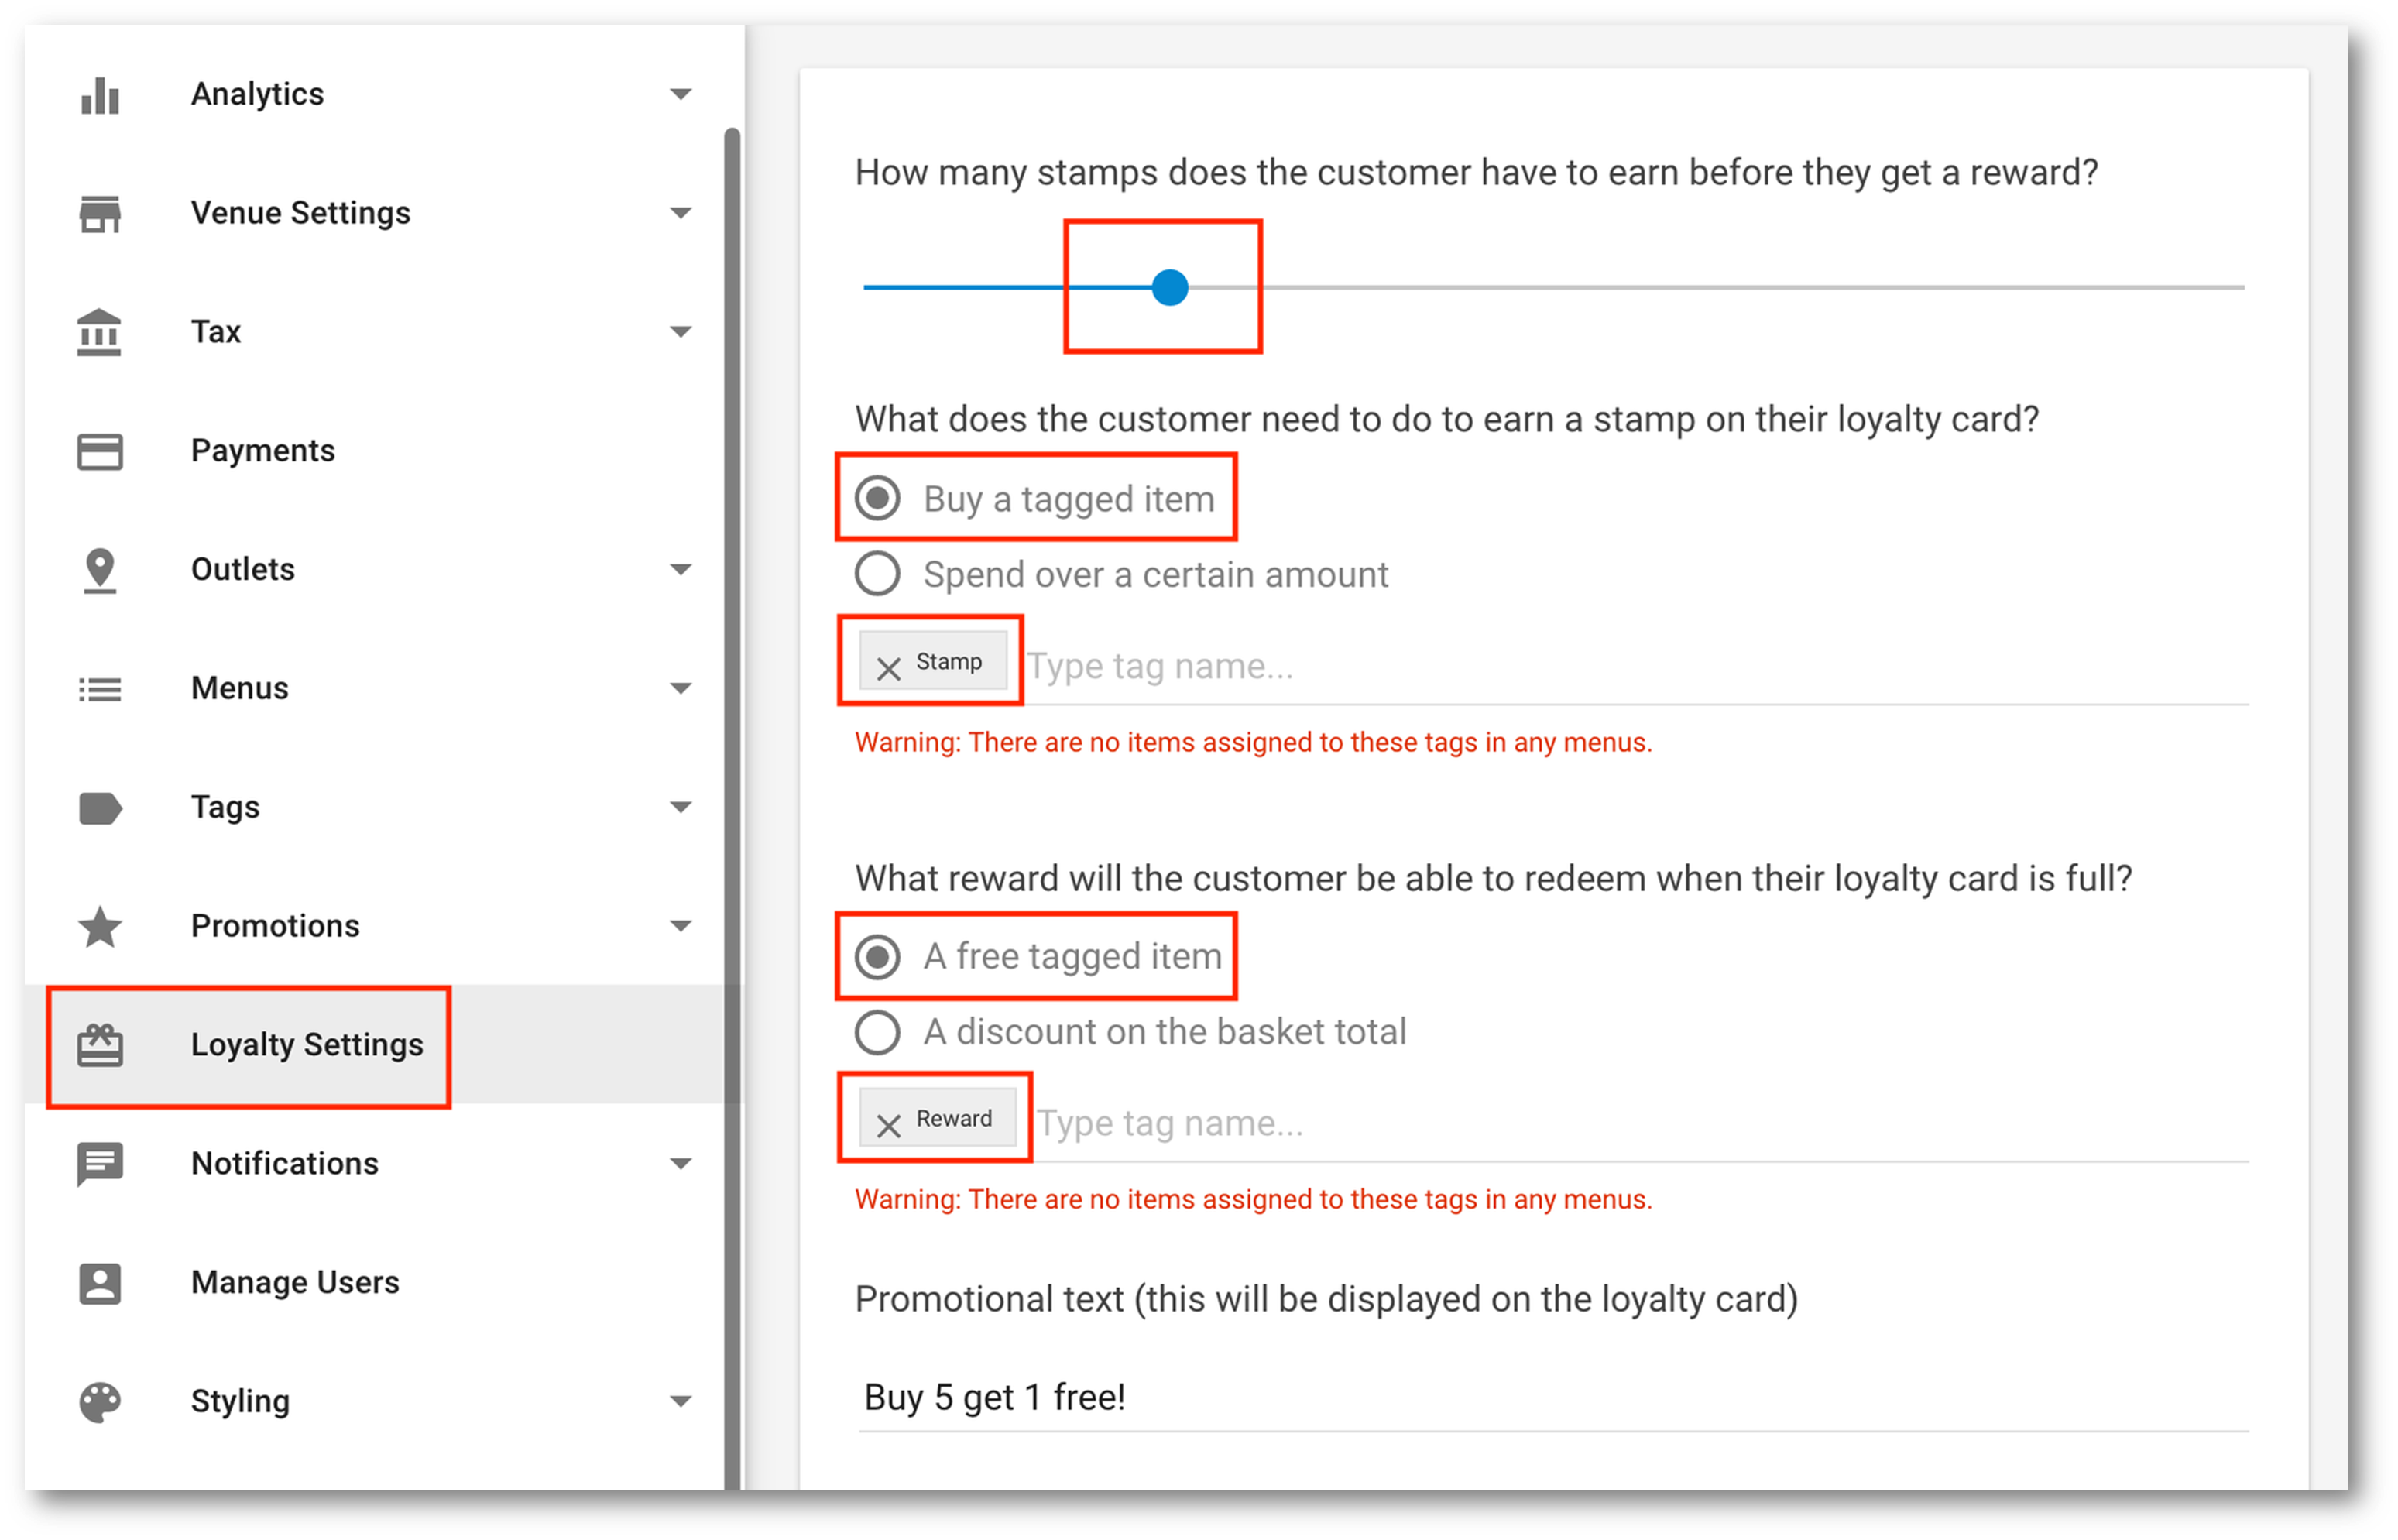
Go to Loyalty Settings on the left hand side and set up your card
Choose how many stamps you require the customer to earn until they get a loyalty reward by dragging the bar from left to right (maximum 12)
Select Buy a tagged item
In Type Tag Name enter the word 'Stamp'
Then in the Reward section select A free tagged item
To offer ‘A discount on basket total' see steps 5 - 7 on 'How to set up a Loyalty Stamp Card for a Minimum Spend’ before returning to these instructions for steps 12 - 16
Where it says Type Tag name enter the word 'Reward'
Add your promotional text in the section at the bottom
All changes will be saved automatically. There will be a warning sign saying that there are no items assigned to these tags in any menus, so we’ll go add them next
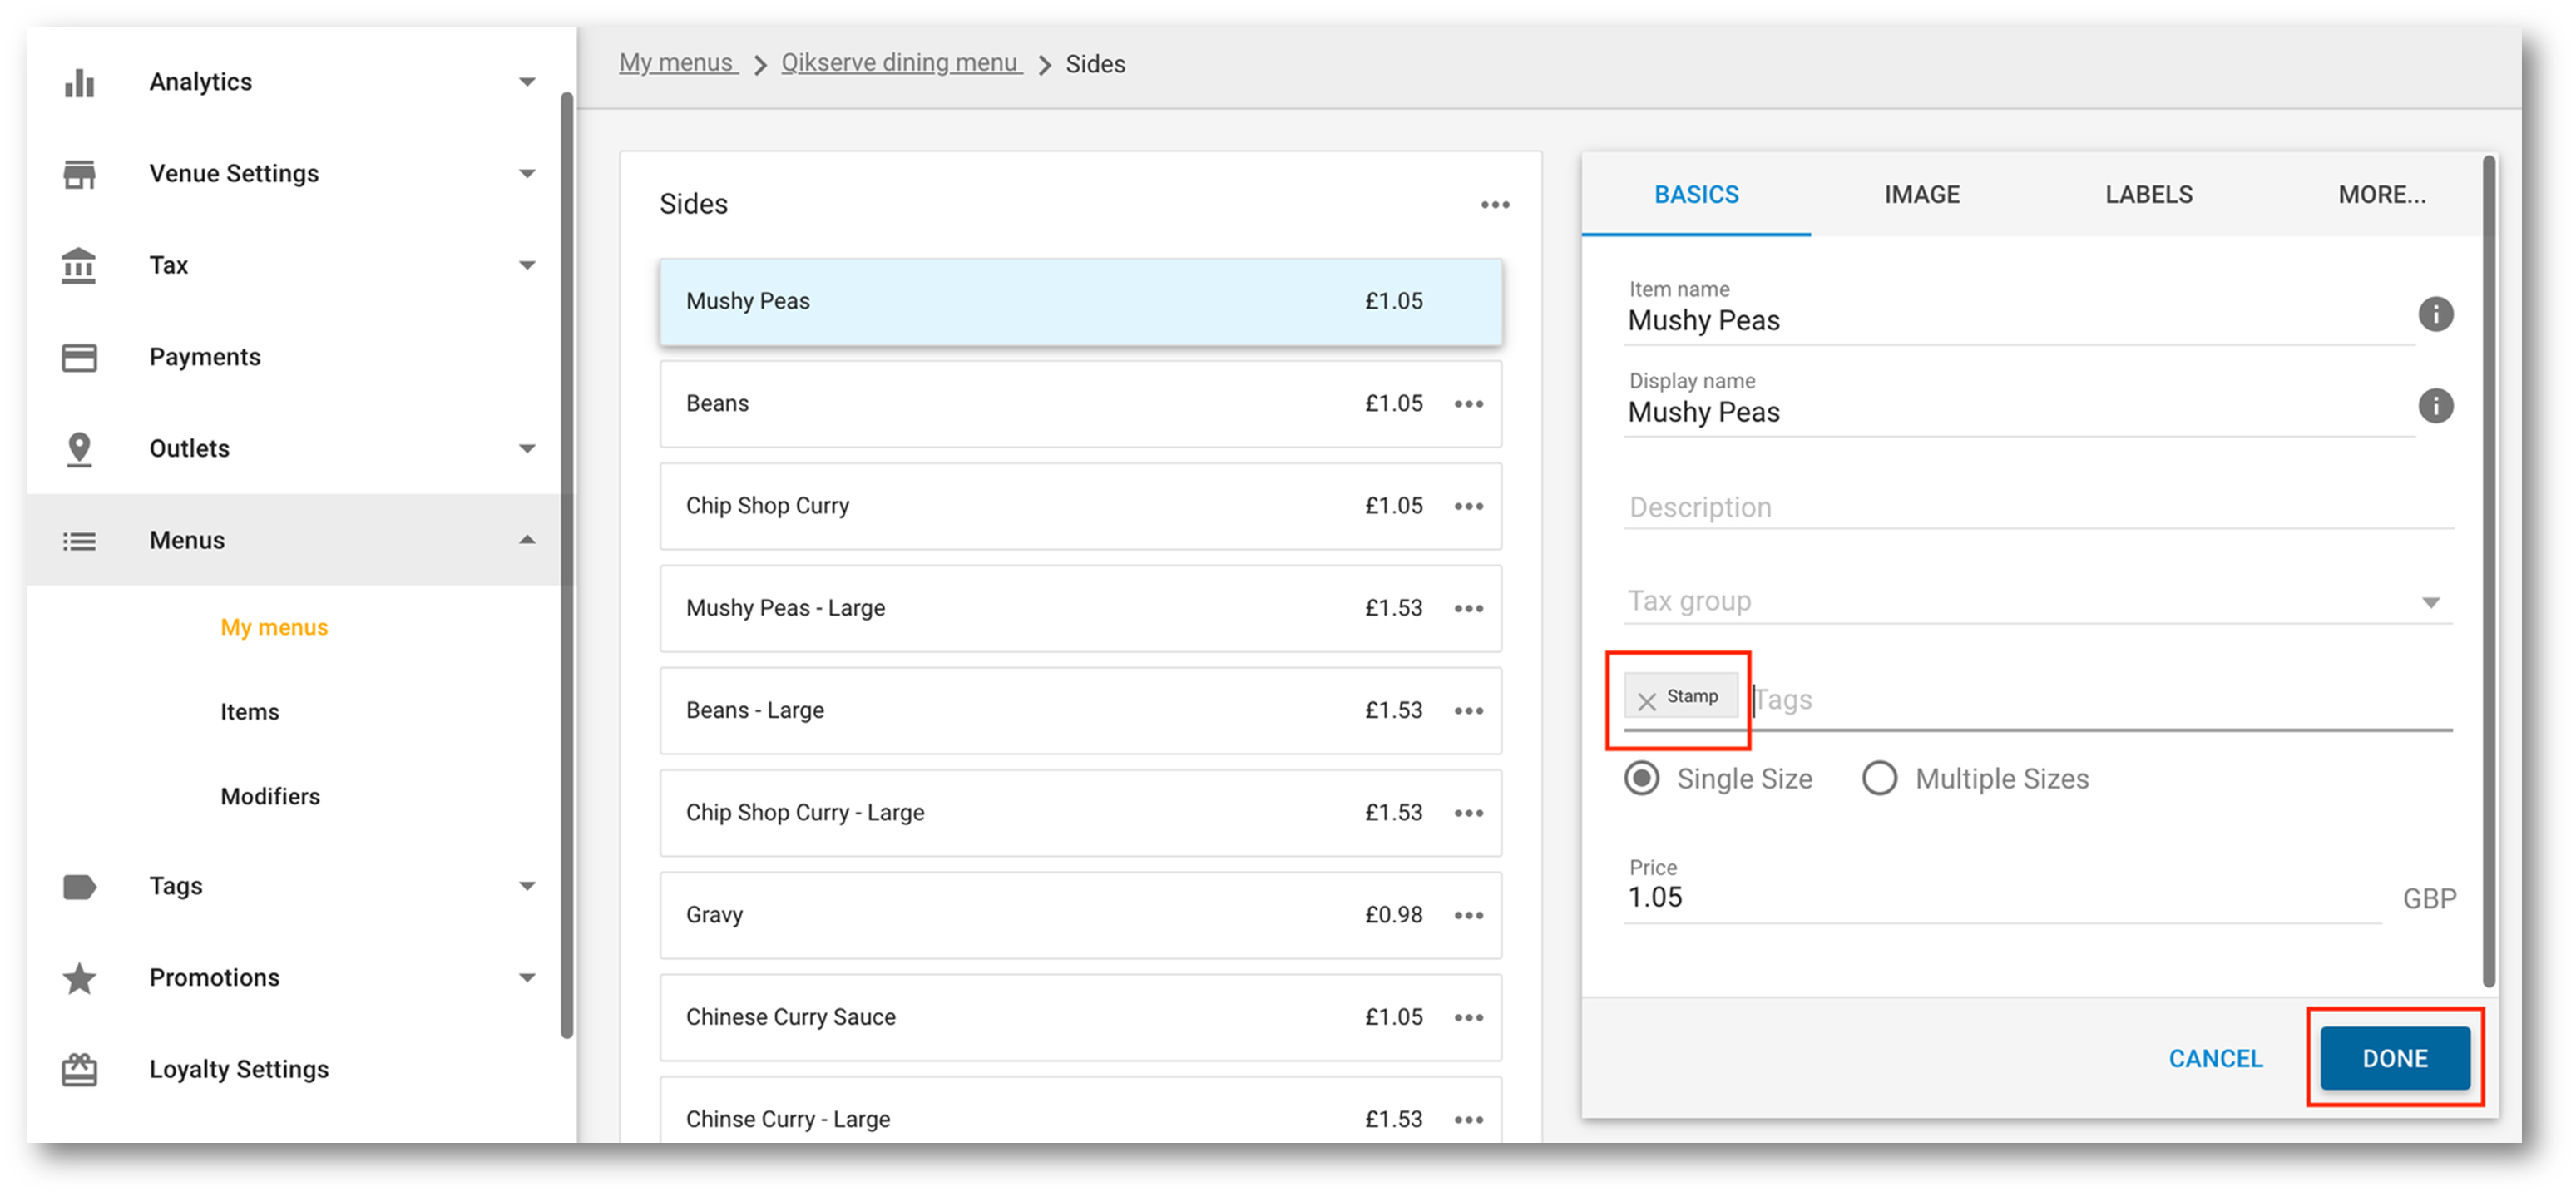
Go to Menus > My Menus and select the menu you’d like to add the stamp/reward tags to
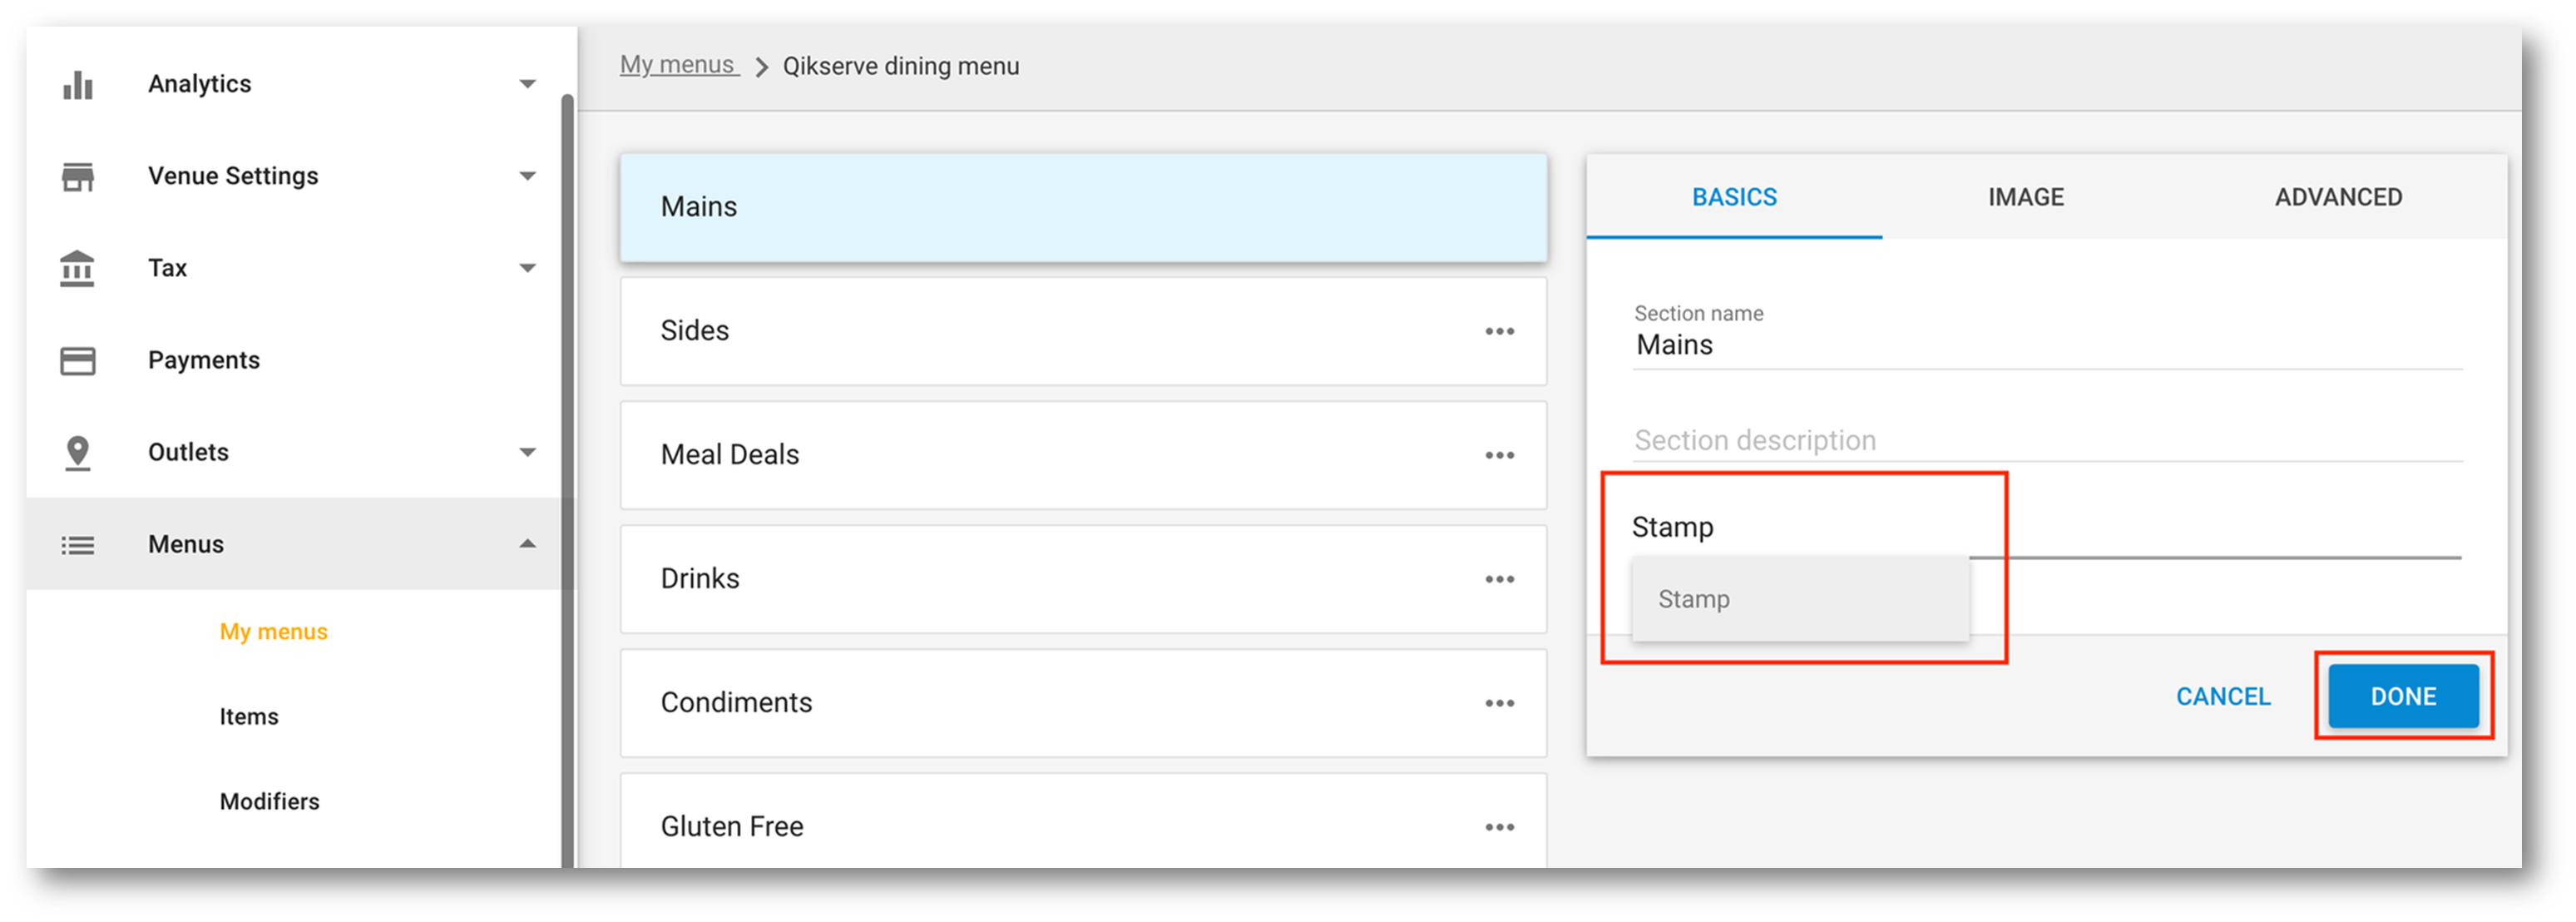
Go directly to the item you'd like your customers to order to receive a stamp. You can also apply the tag to a menu section(s) if you would like apply the tag to all items in that section
Click the 3 dots beside the item/section and click Edit
In Tags add the word 'Stamp'
At Item level:
At Section level:You will see this symbol next to any item or section that will gain the customer 1 stamp
You now need to create your Reward items. This needs to be an entirely new menu item that will remain hidden!
Important: If you are POS integrated you cannot build new items or duplicate existing ones. All items must come from your till. So in that scenario you would create the items on the till, and perhaps your menu section too, and then import them as you normally would. Then you can apply the tag in step 18 and continue
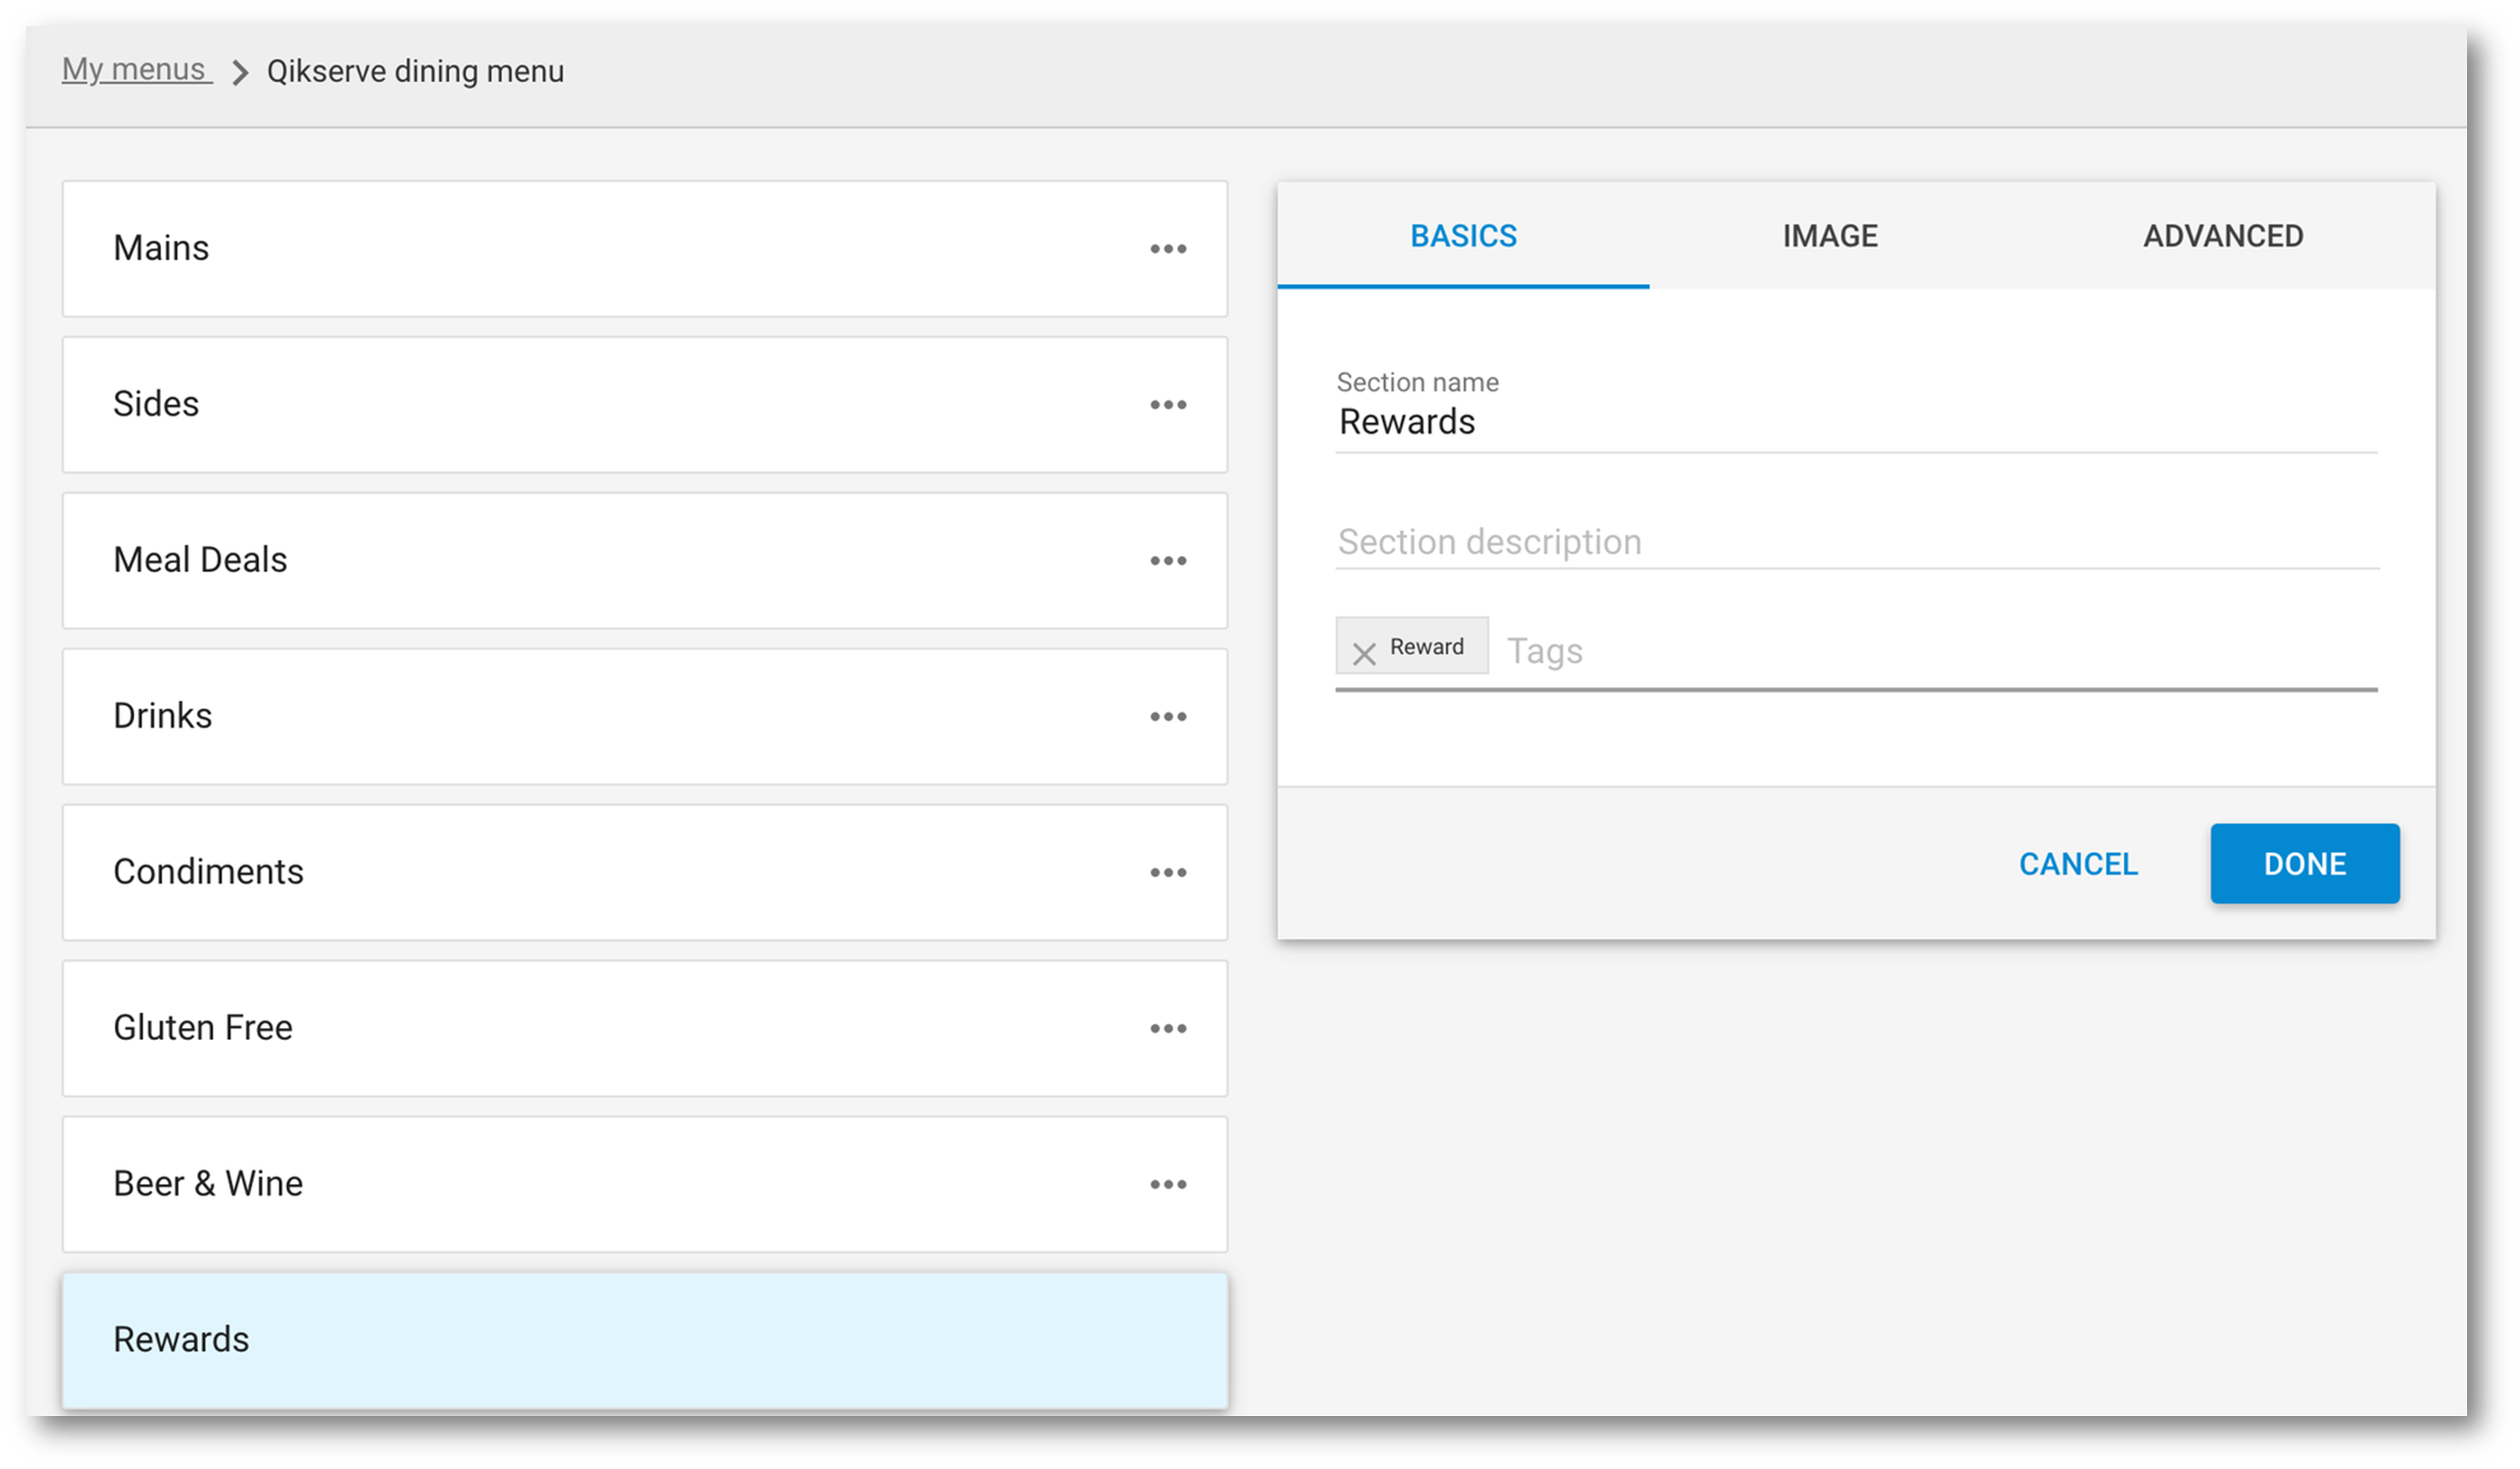
In your menu create a new section called ‘Rewards’. You can also tag the section with ‘Reward’ now or you can apply it to each item later
Inside the menu section called Rewards create the item as a normal menu item and cost it at £0.00. More information on creating menu items available here
Pro tip - from Menus > Items you can duplicate an item and then edit the new one that appears at the top of the Items list to be £0.00. Then in your Rewards menu section you can import this new duplicated item. Make sure the Stamp and Reward tags are not both on the new item however.
In the Tags area of the new item you created add the tag ‘Reward' if you haven’t already done so at the menu section level
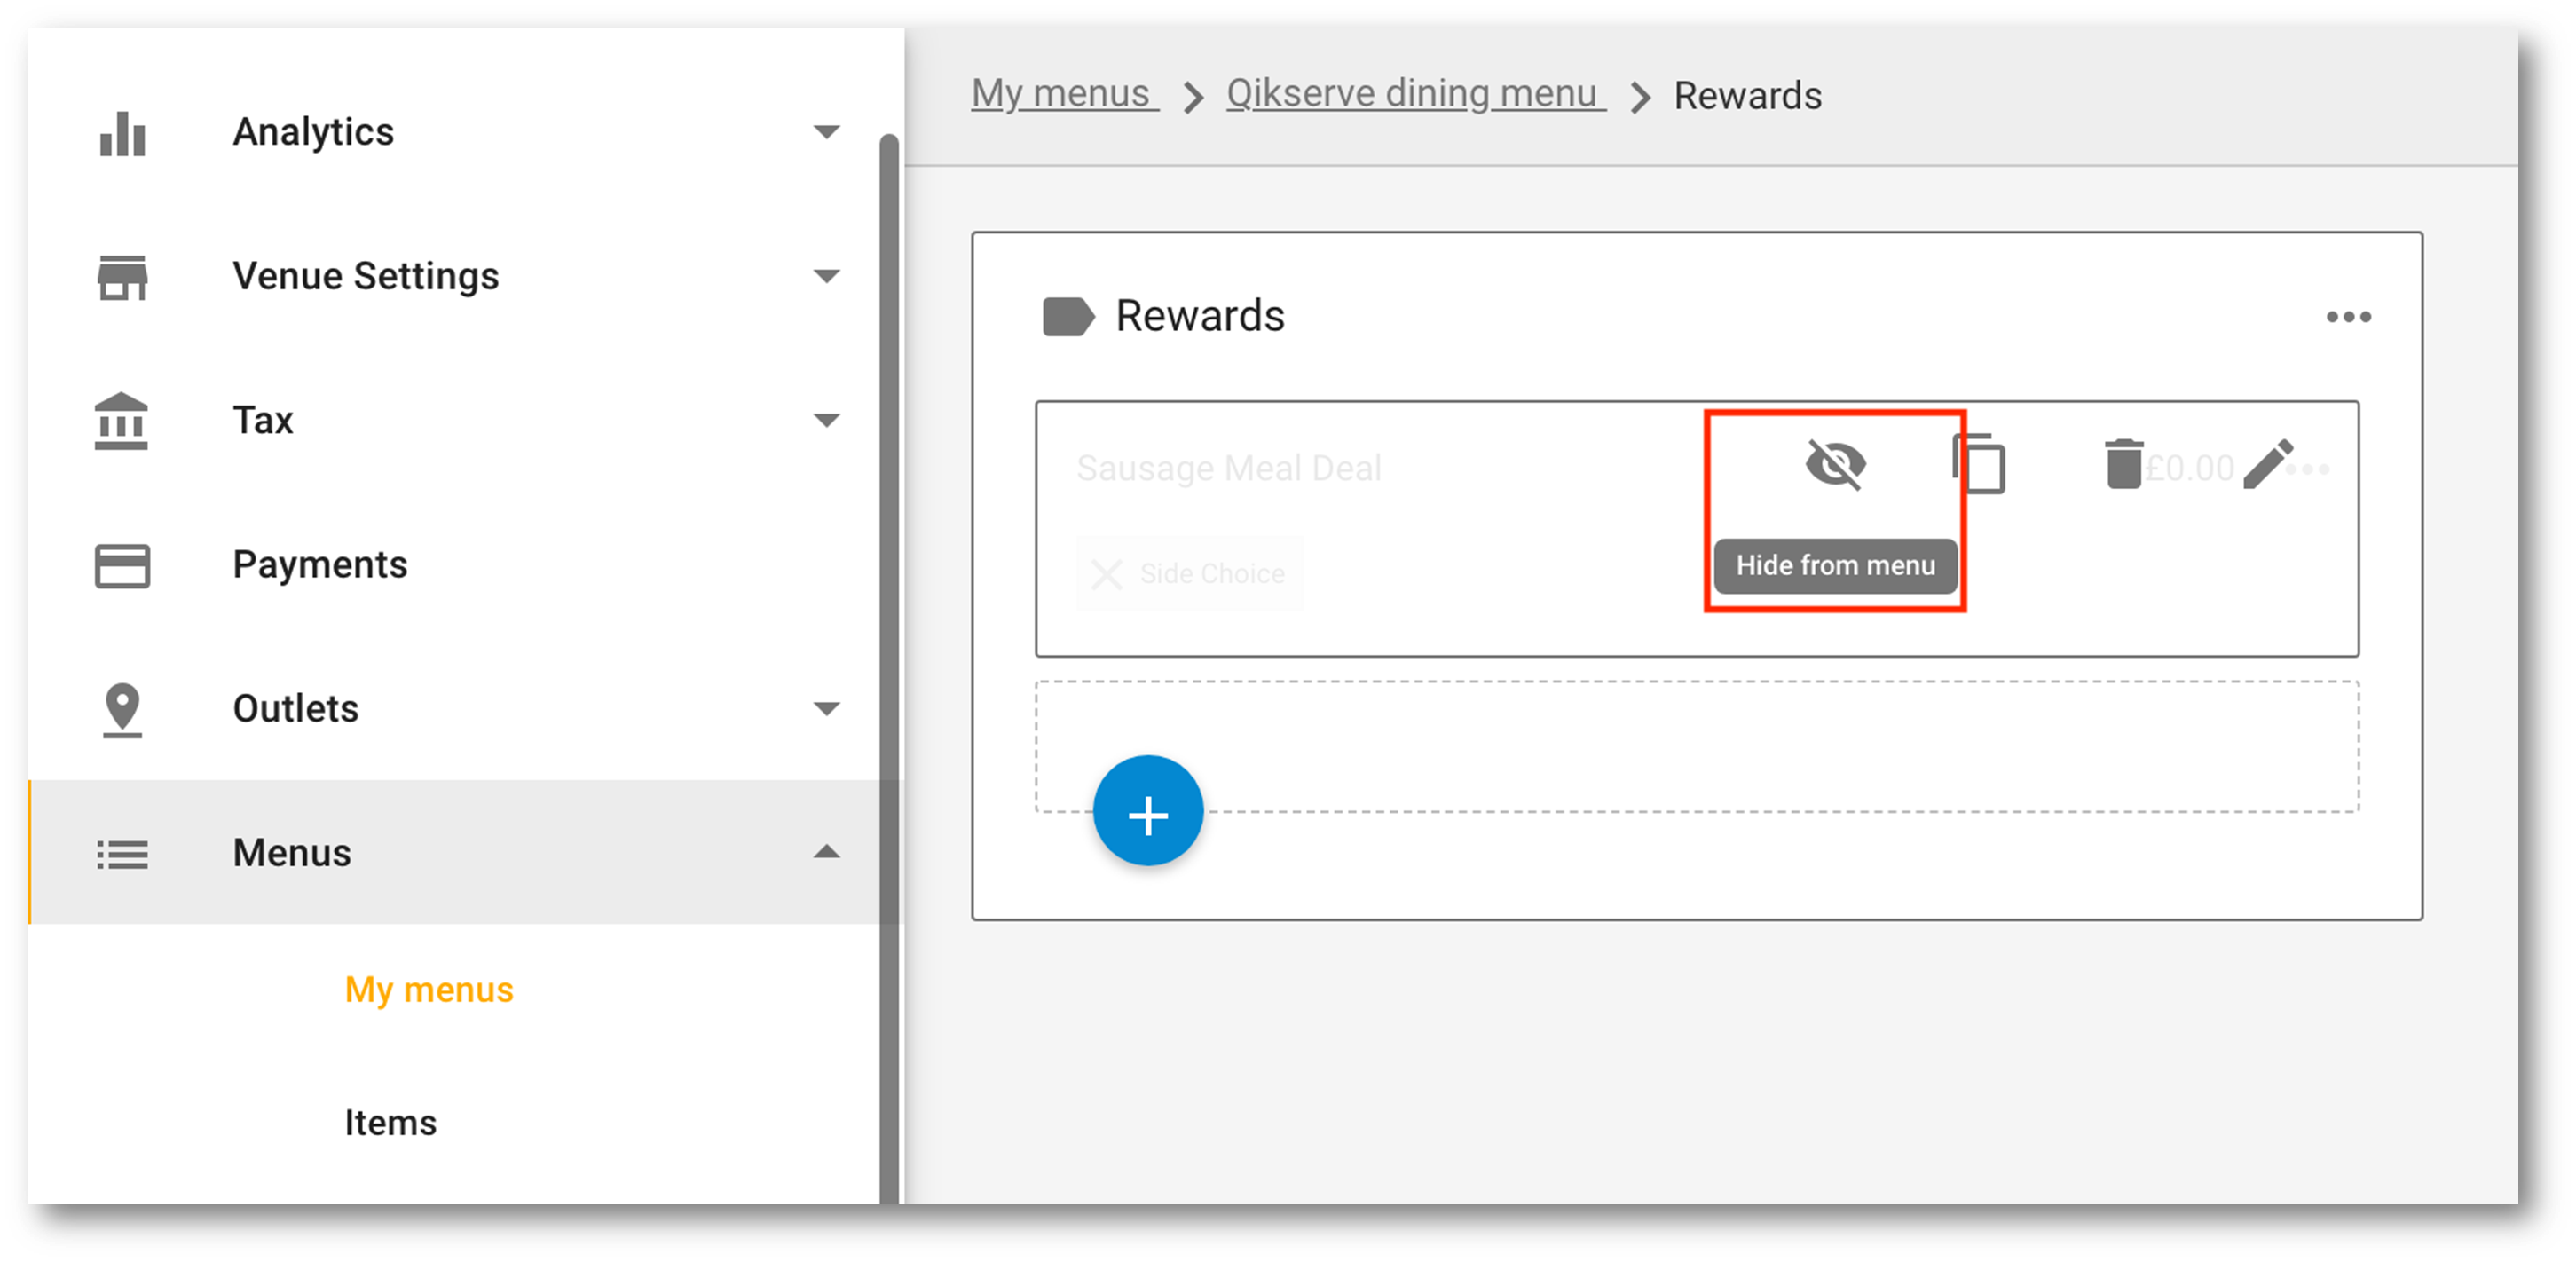
Then hide each new free item you create by scrolling over the 3 dots on the right hand side of the item and clicking on the eyeball icon
**If all your items are hidden then the menu section will not be visible to customers on the ordering pageYour stamp card is now ready to go!
...
Go to your Dashboard
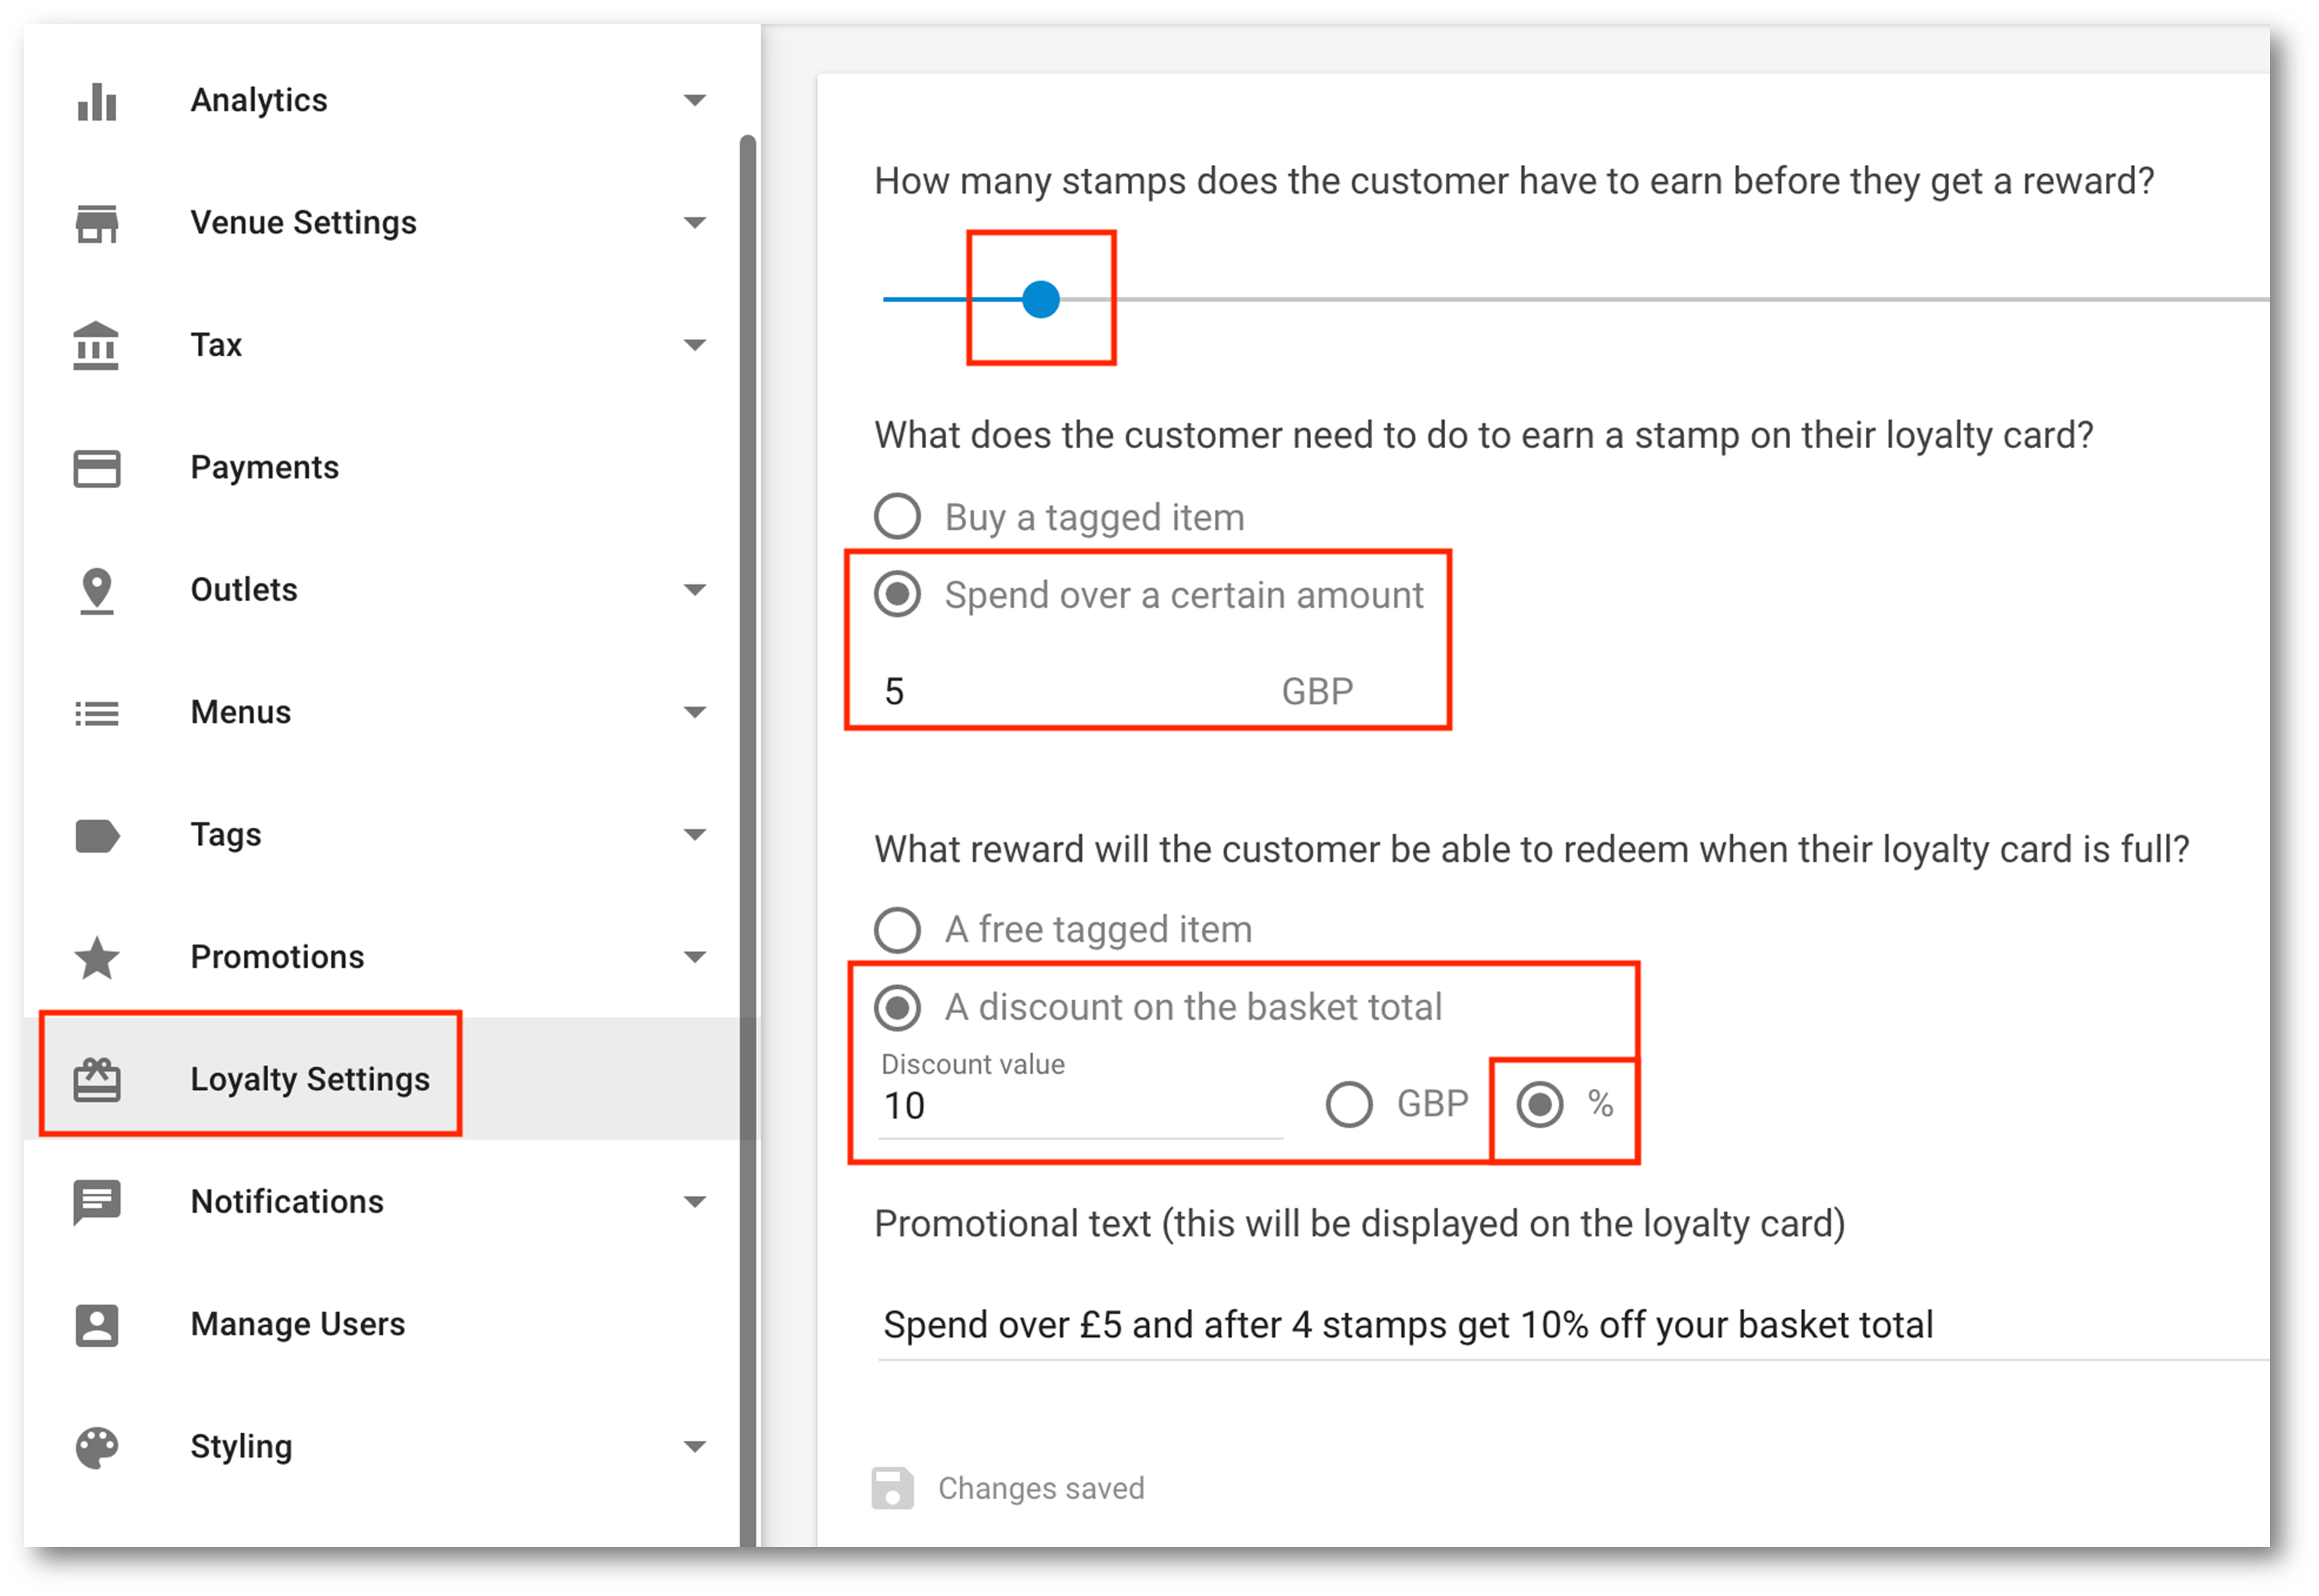
Go to Loyalty Settings on the left hand side
Configure how many stamps you'd like the customer to earn in order to redeem their reward
Choose Spend over a certain amount and enter your figure
Choose the reward to be A discount on the basket total
you could also choose a free tagged item as outlined in the previous instructions
Choose a free tagged item
Go to 'Tags'
Create a tag called 'Reward'
You now need to create your Reward menu section, and add items. Follow the steps numbered 16 - 20 from the previous instructions before coming back to finish here from step 7
Enter your value and select either % / £ reward
Enter your promotional text
Your stamp card is now ready to go!
...
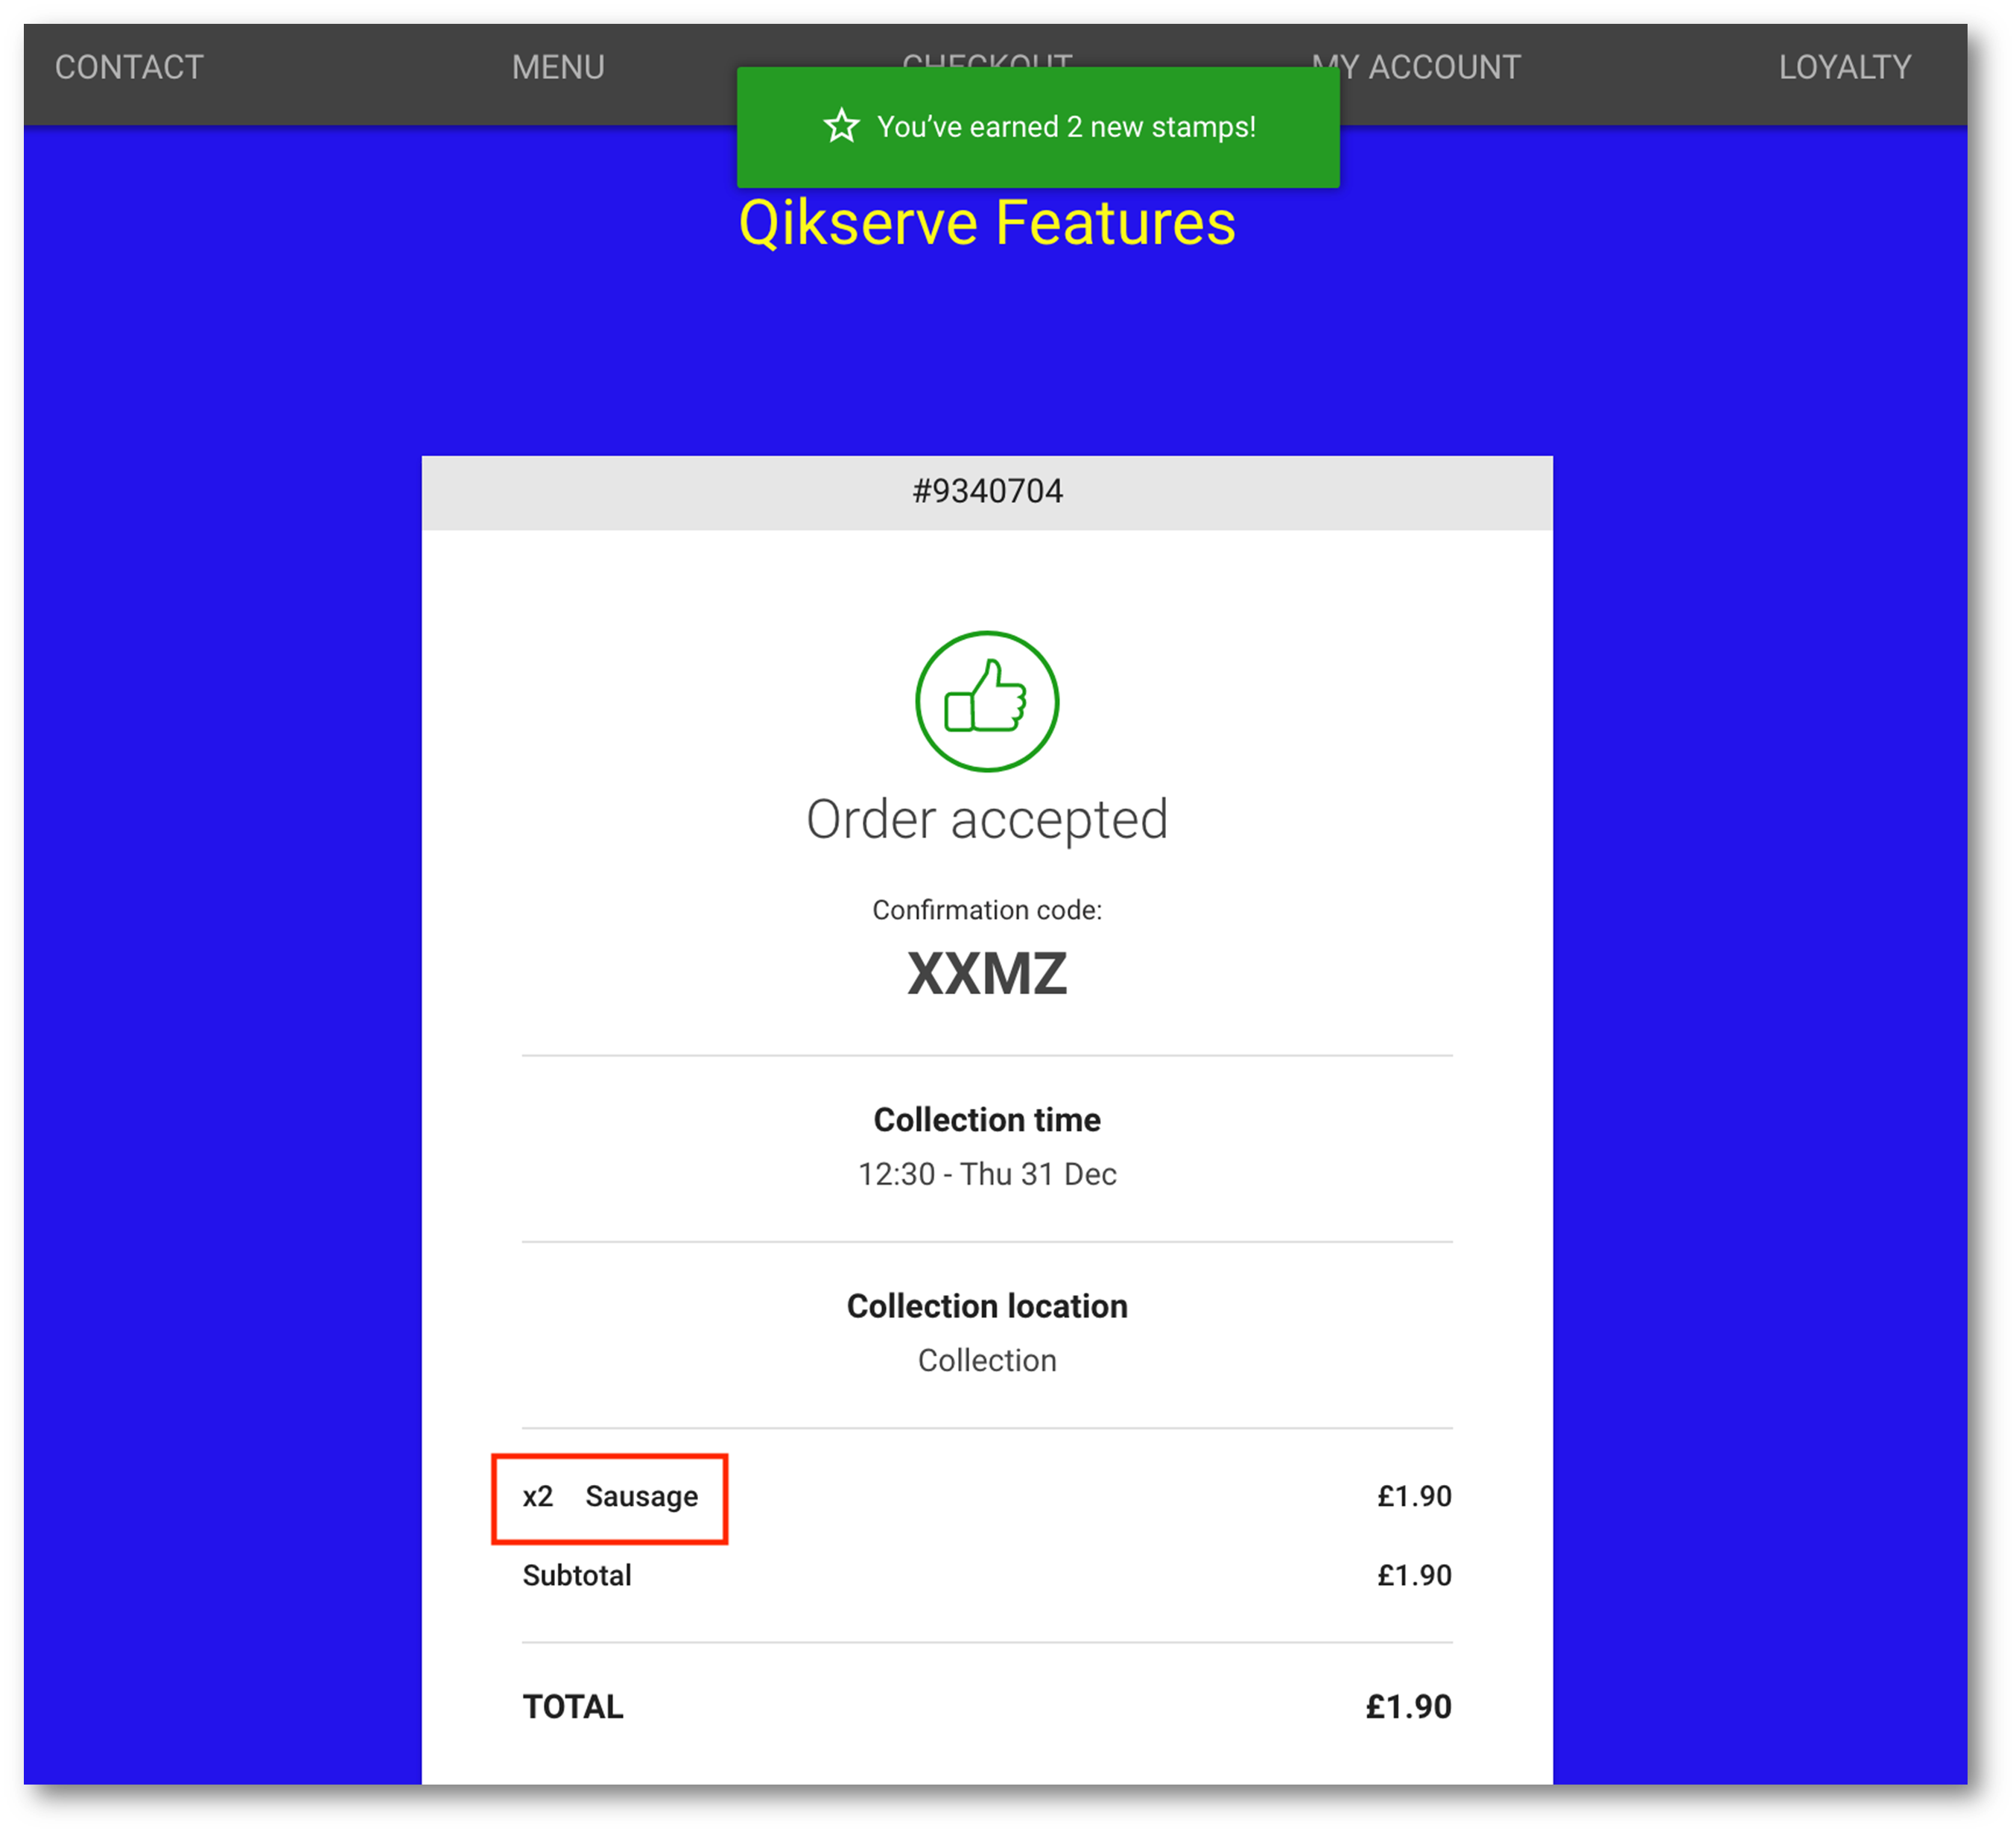
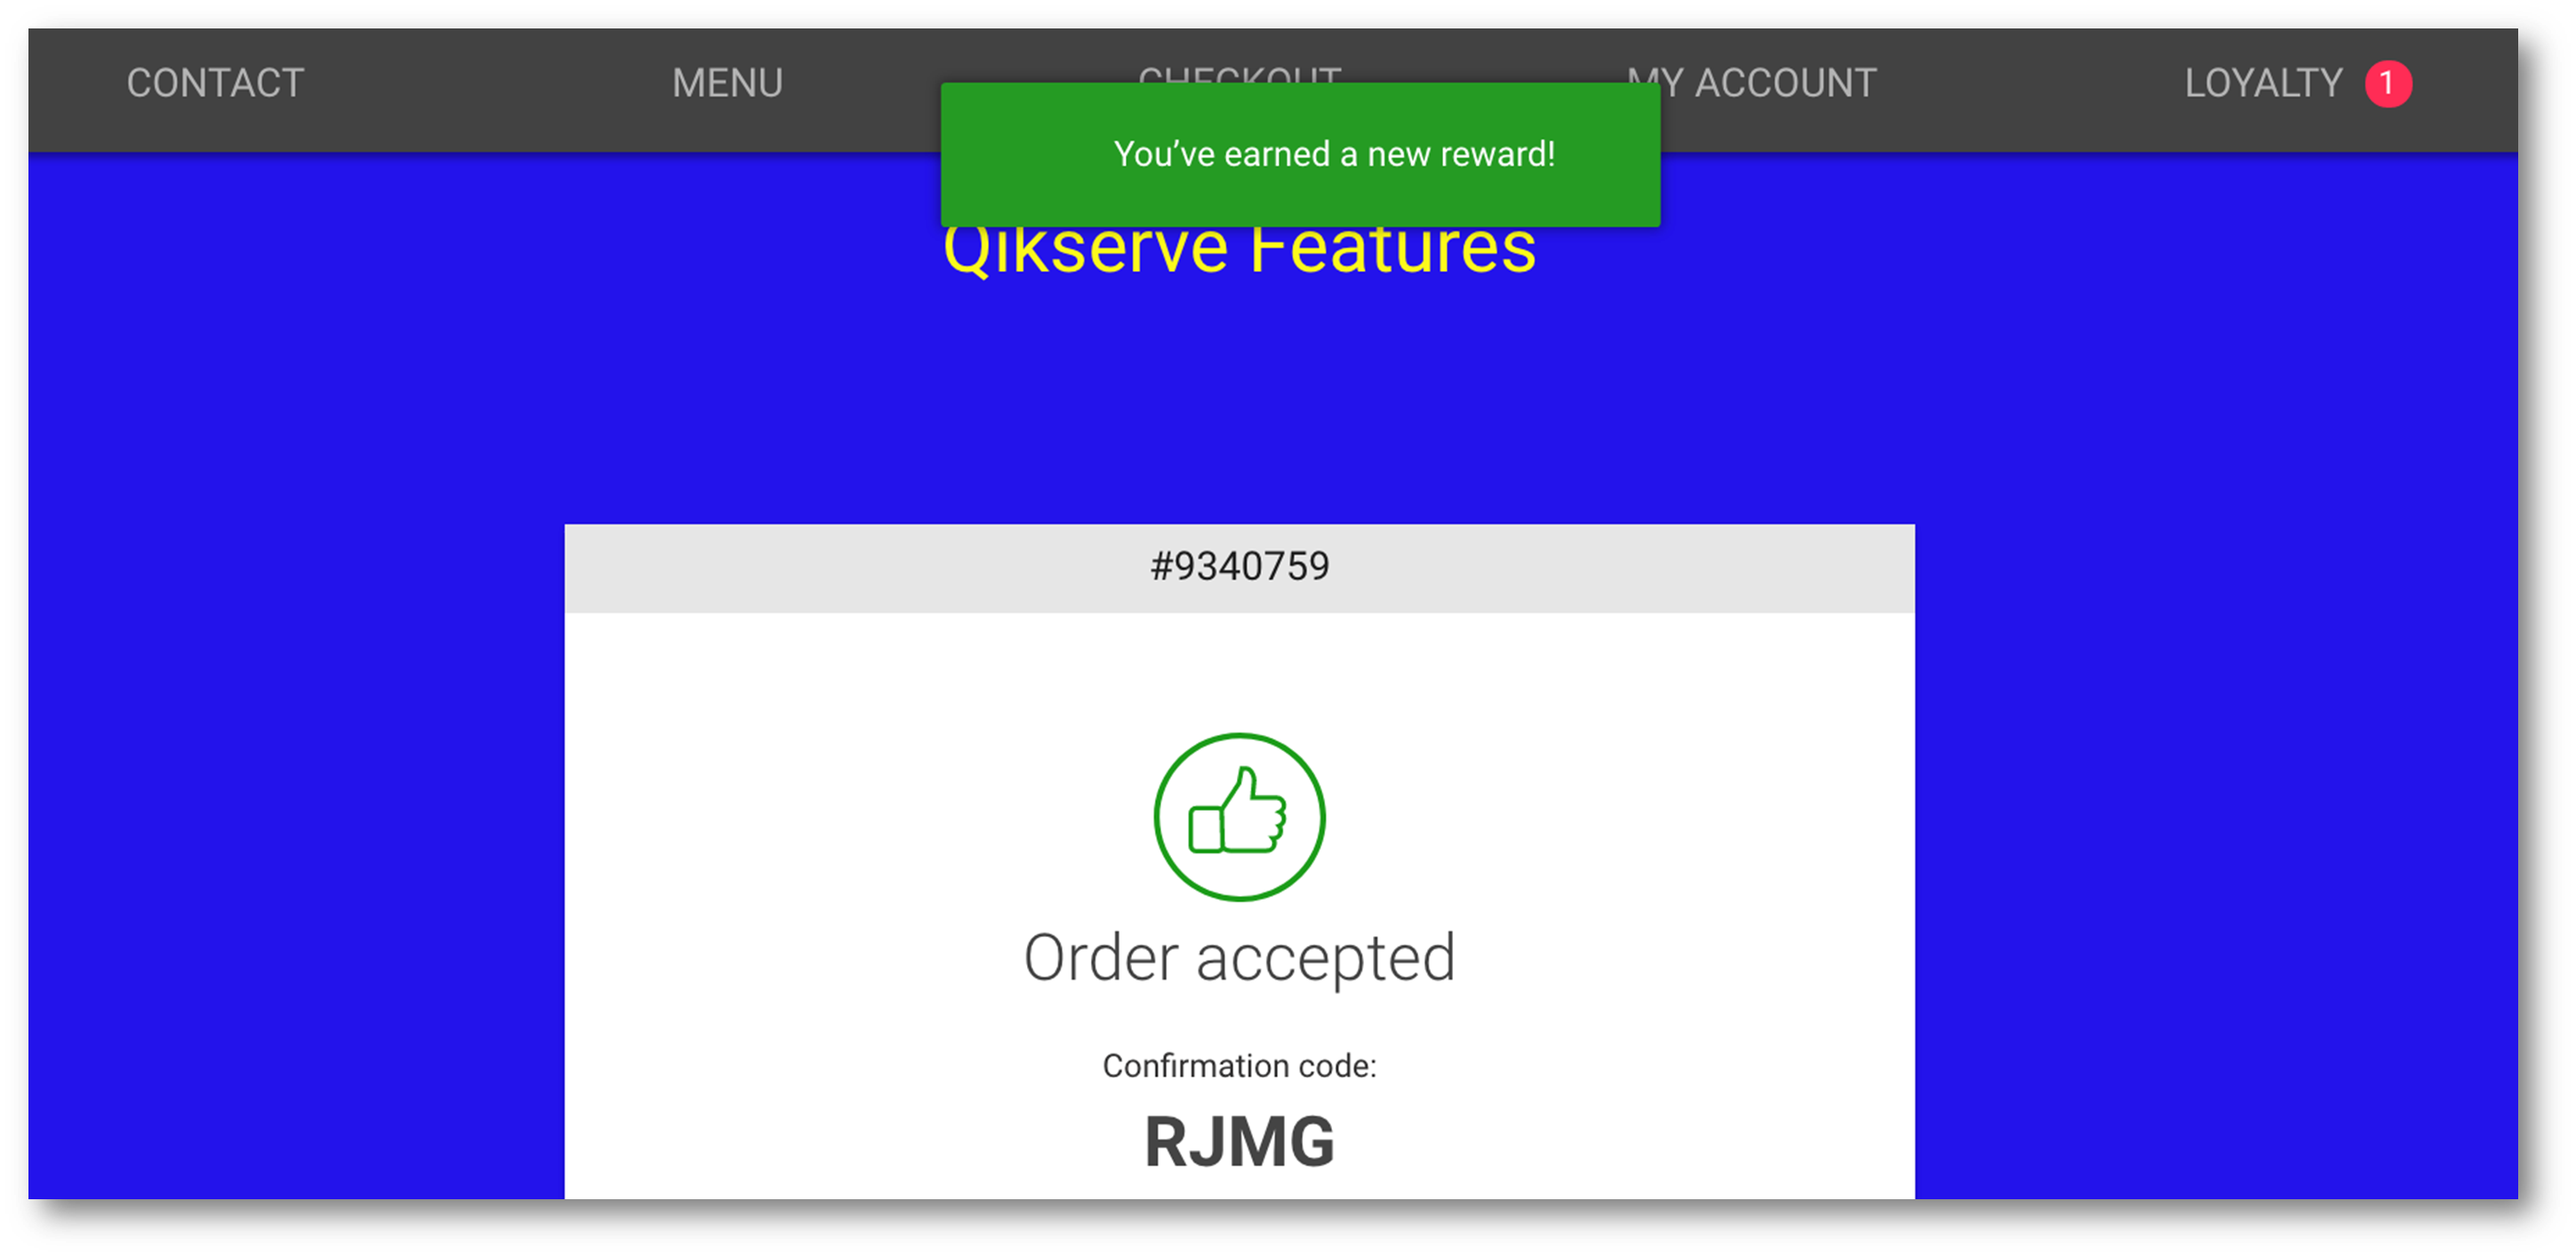
When a customer has ordered an item that is eligible for a Stamp they are notified on the confirmation page and now they have a Loyalty tab on the top bar of the page. Here they have 2 Stamps for ordering two eligible items
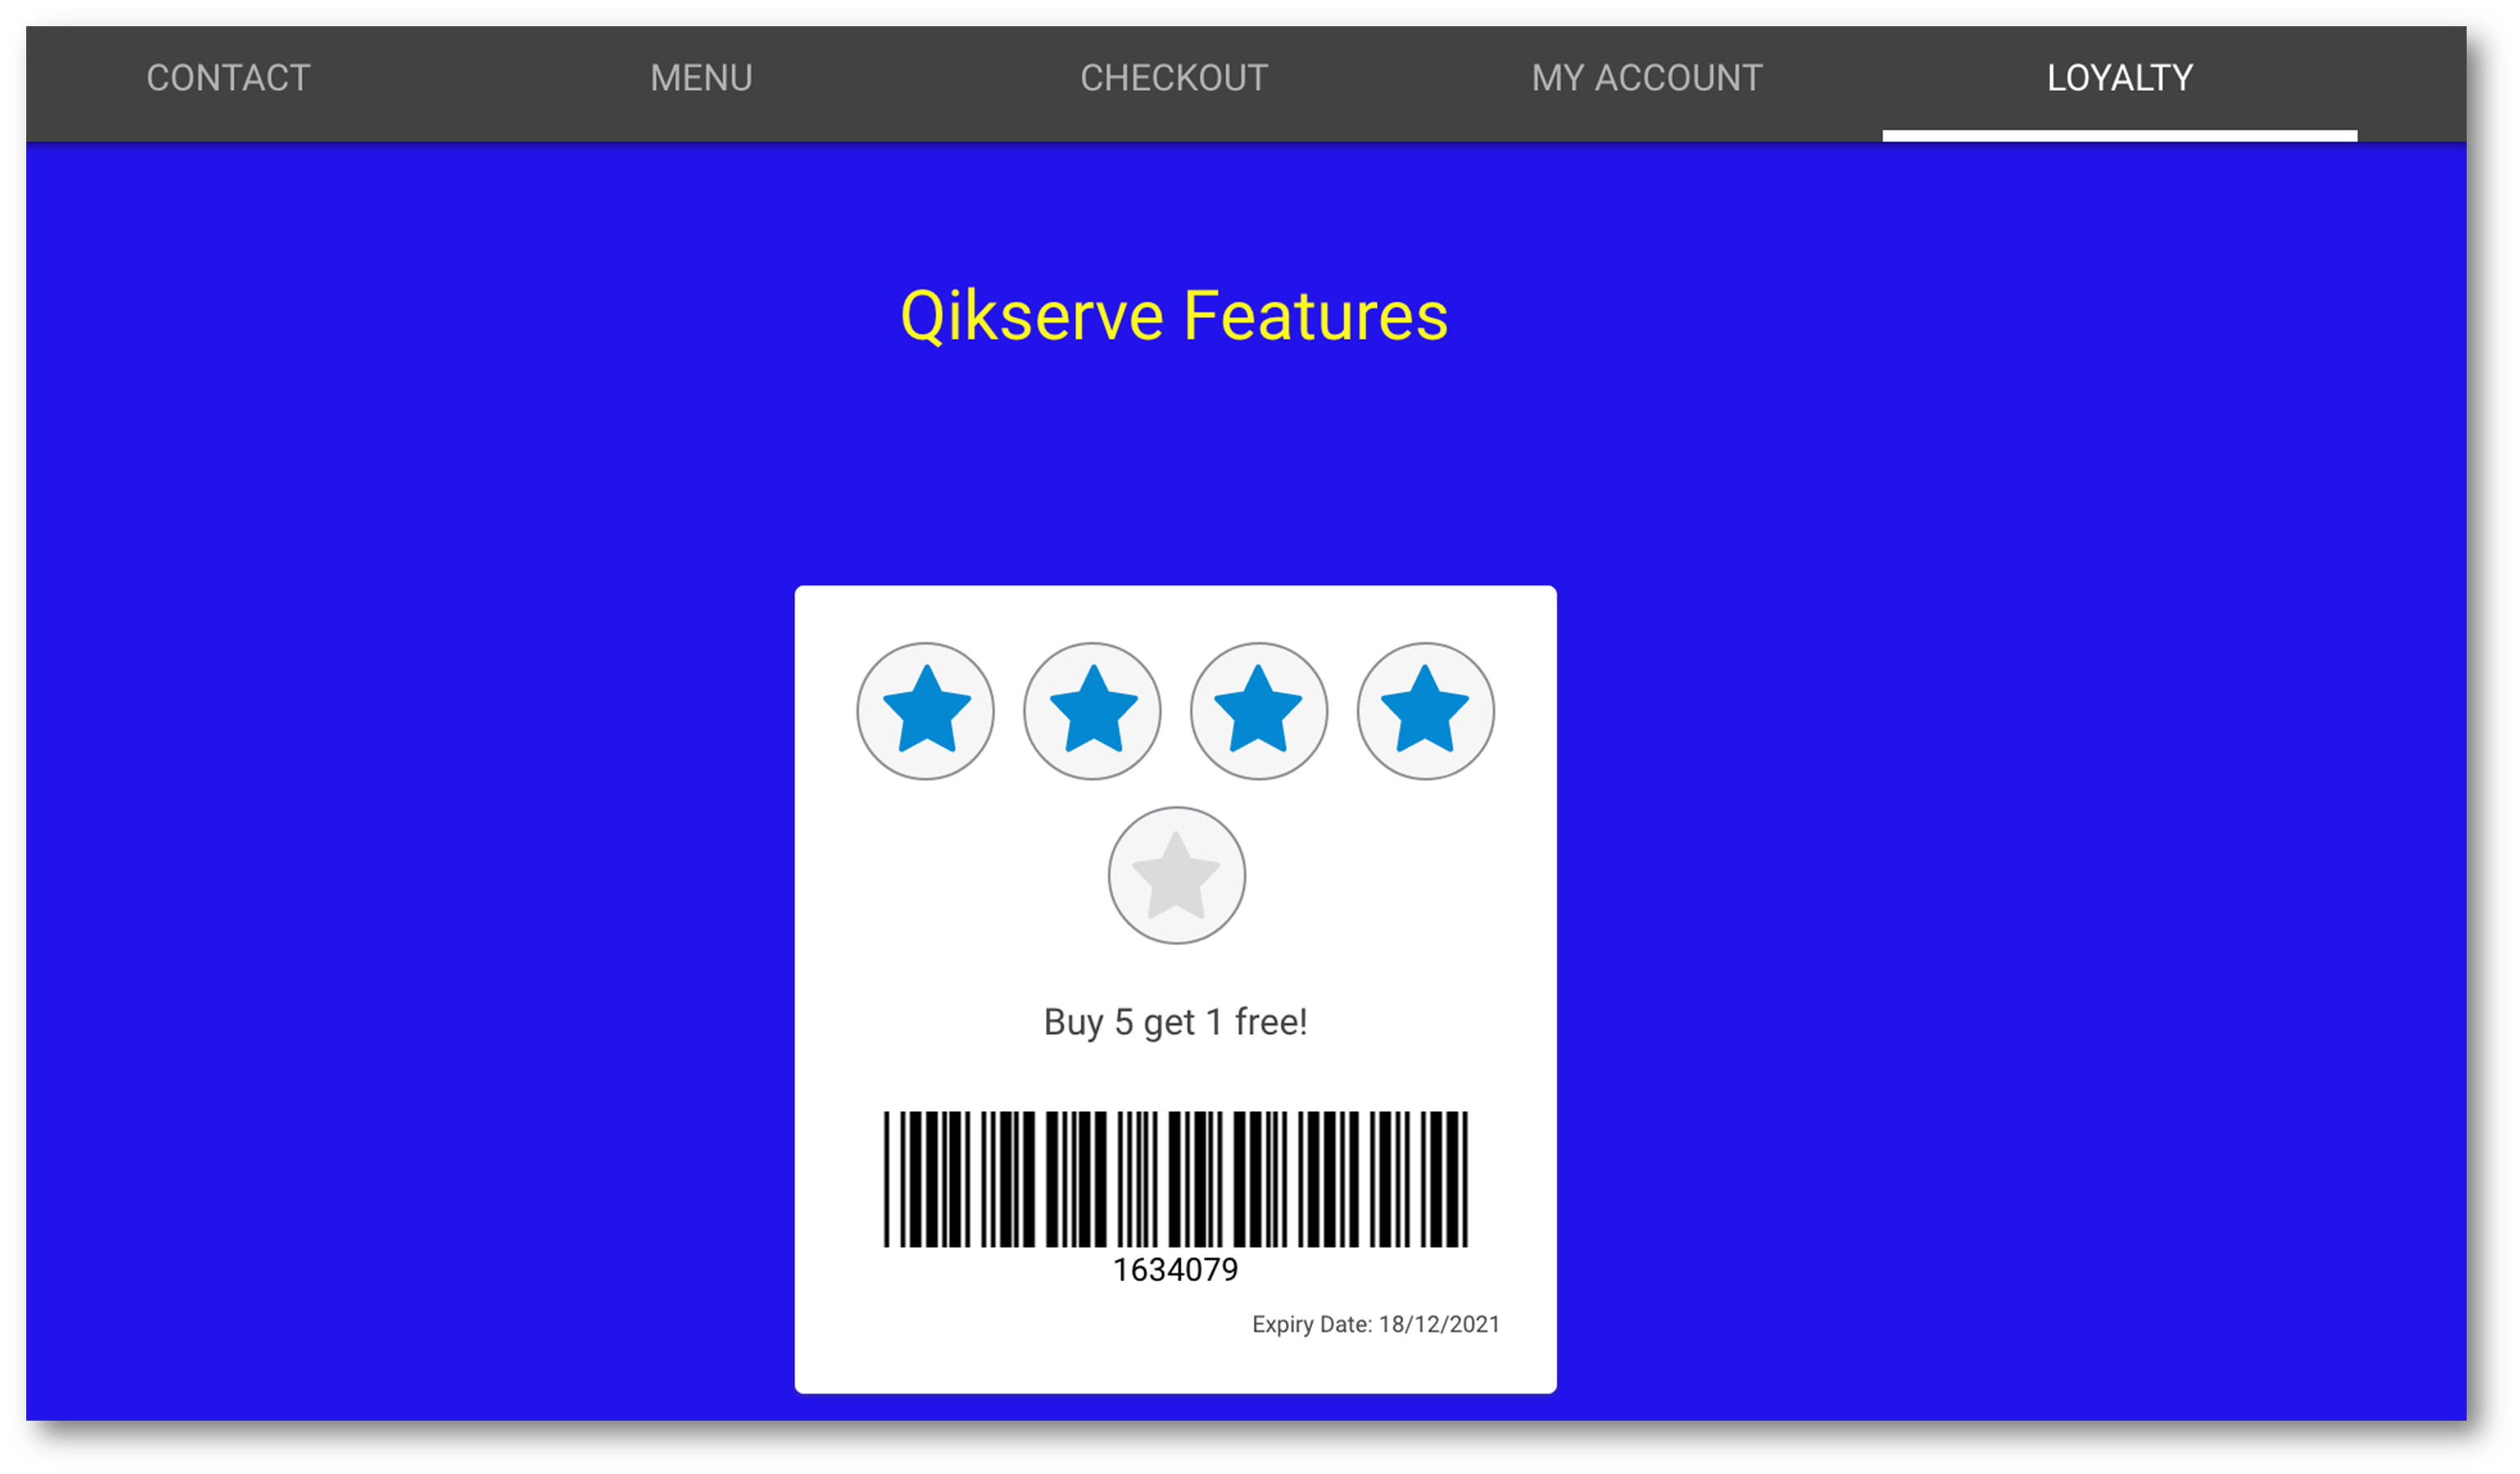
Clicking on the Loyalty tab the customer can see how many stamps they have
Once they have a collected enough Stamps they are notified they have gained a Reward
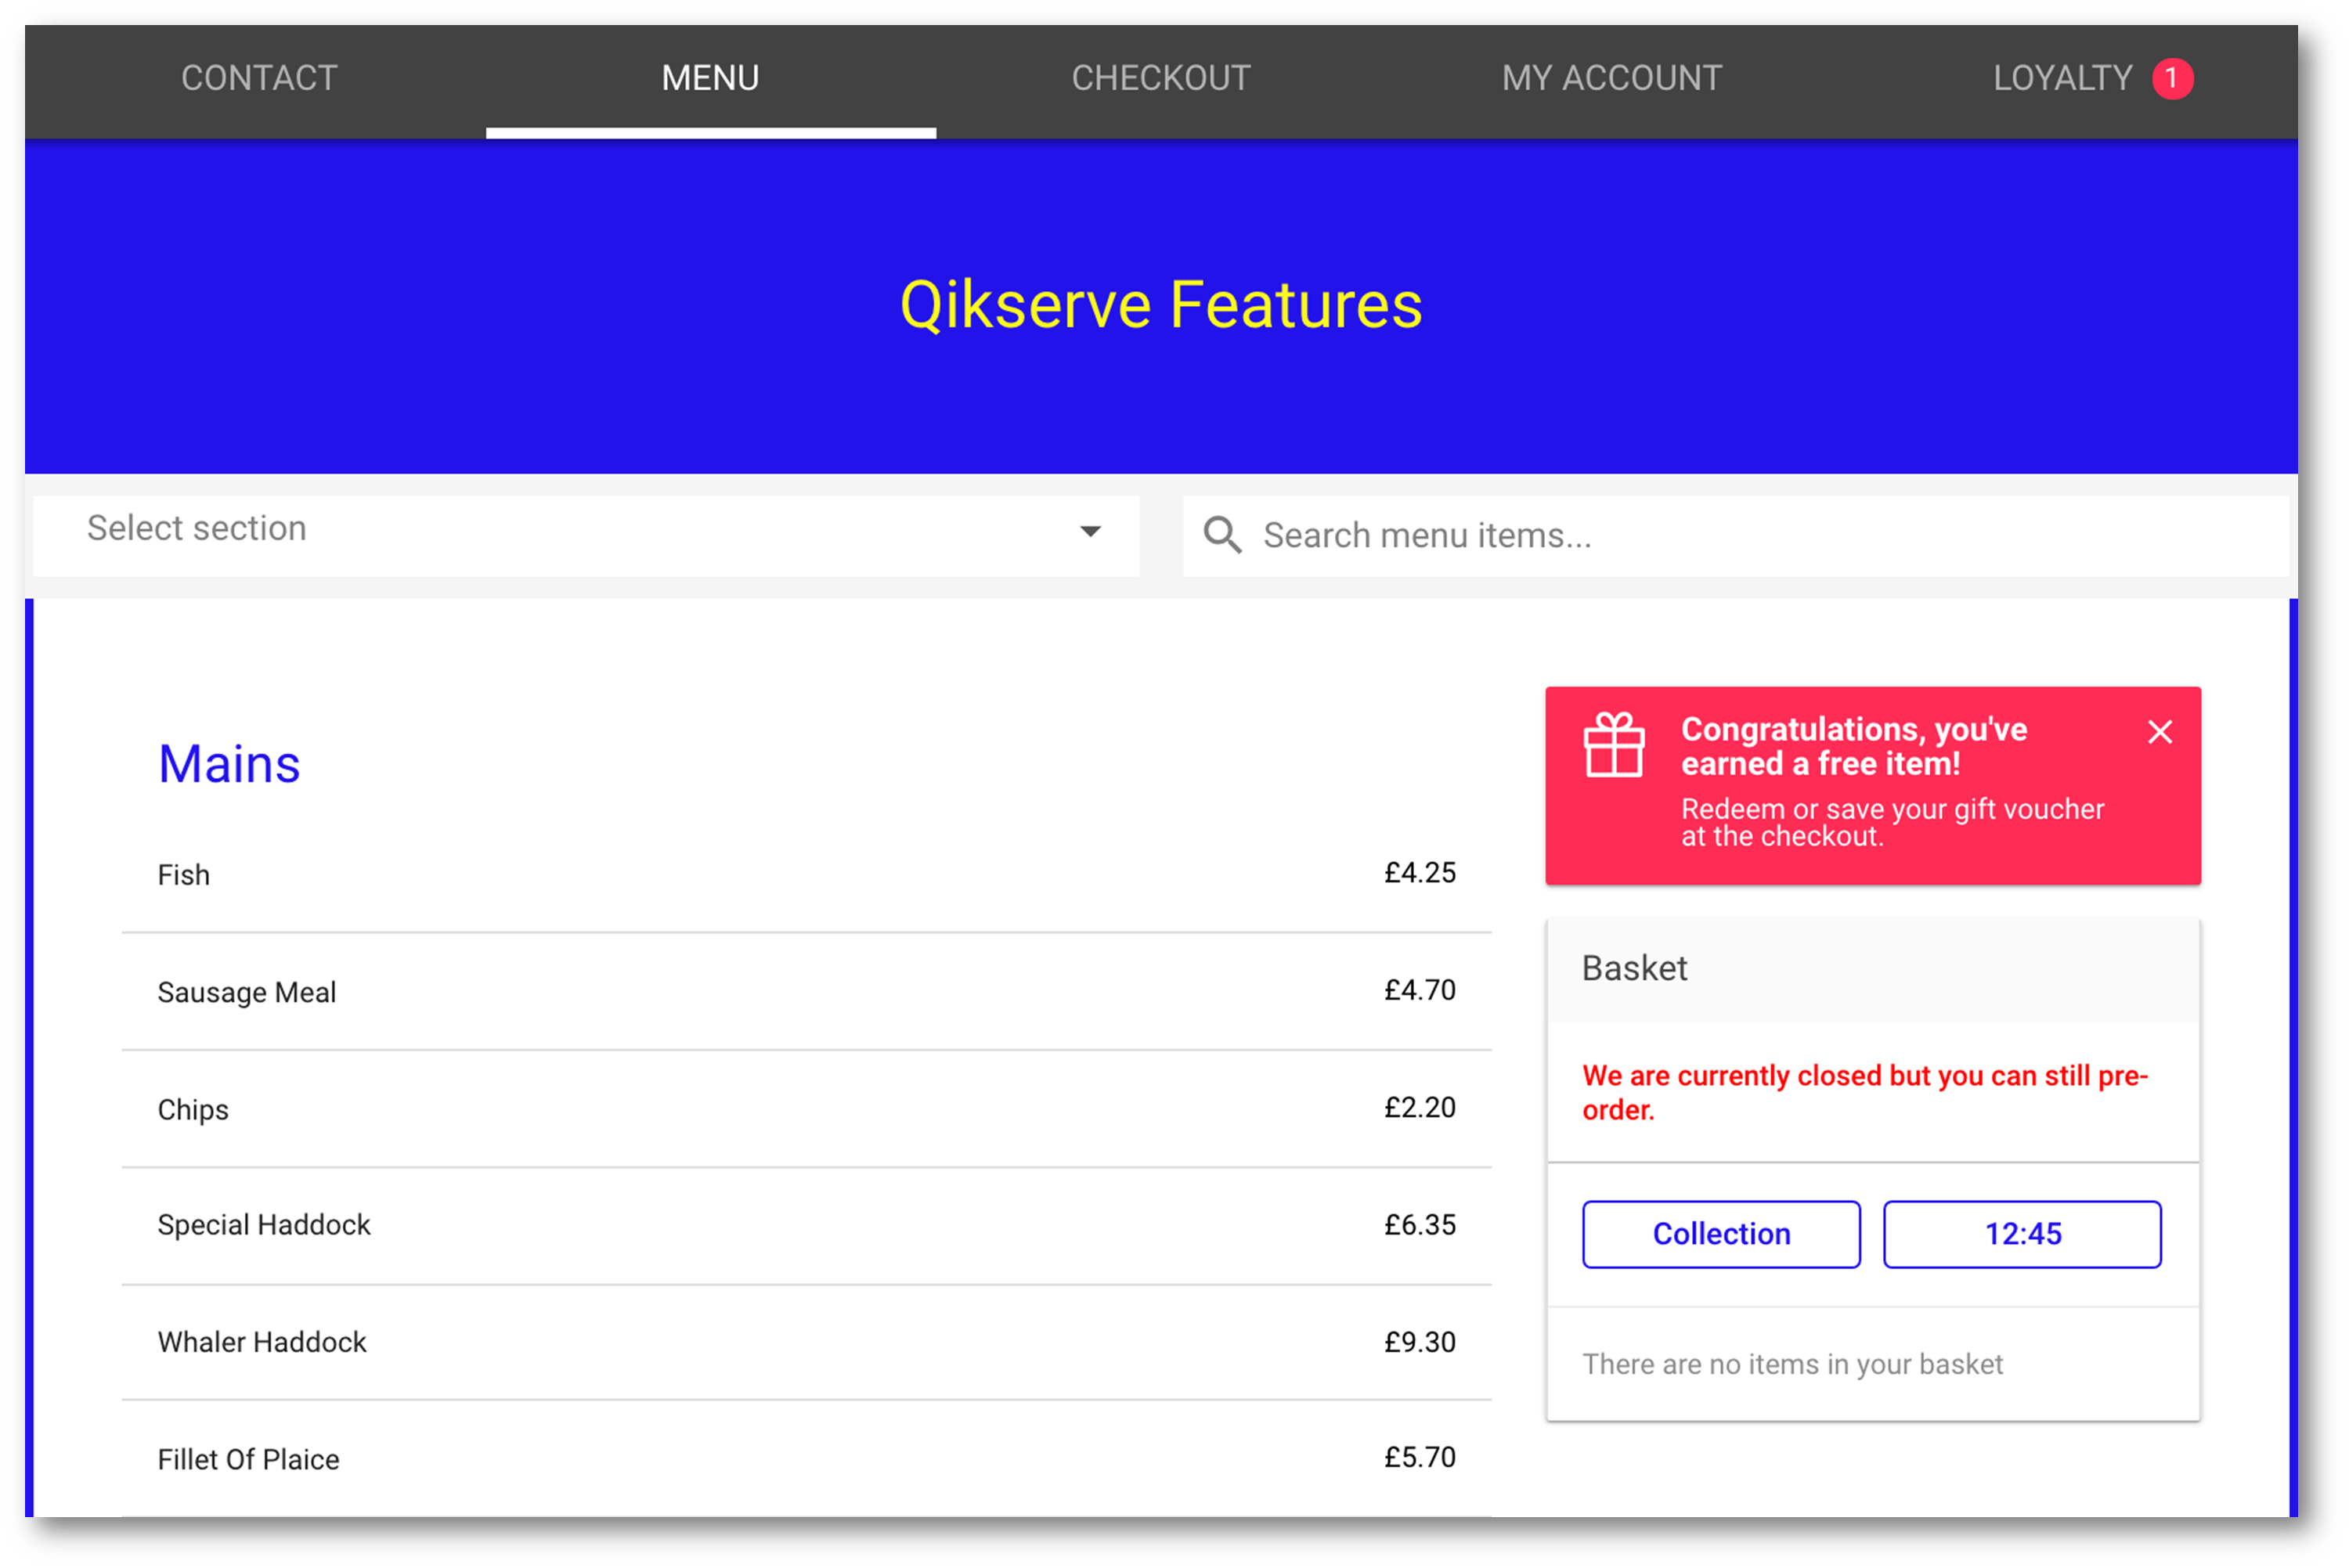
When they return to the menu page they are reminded that if they go to the check out then can claim their reward
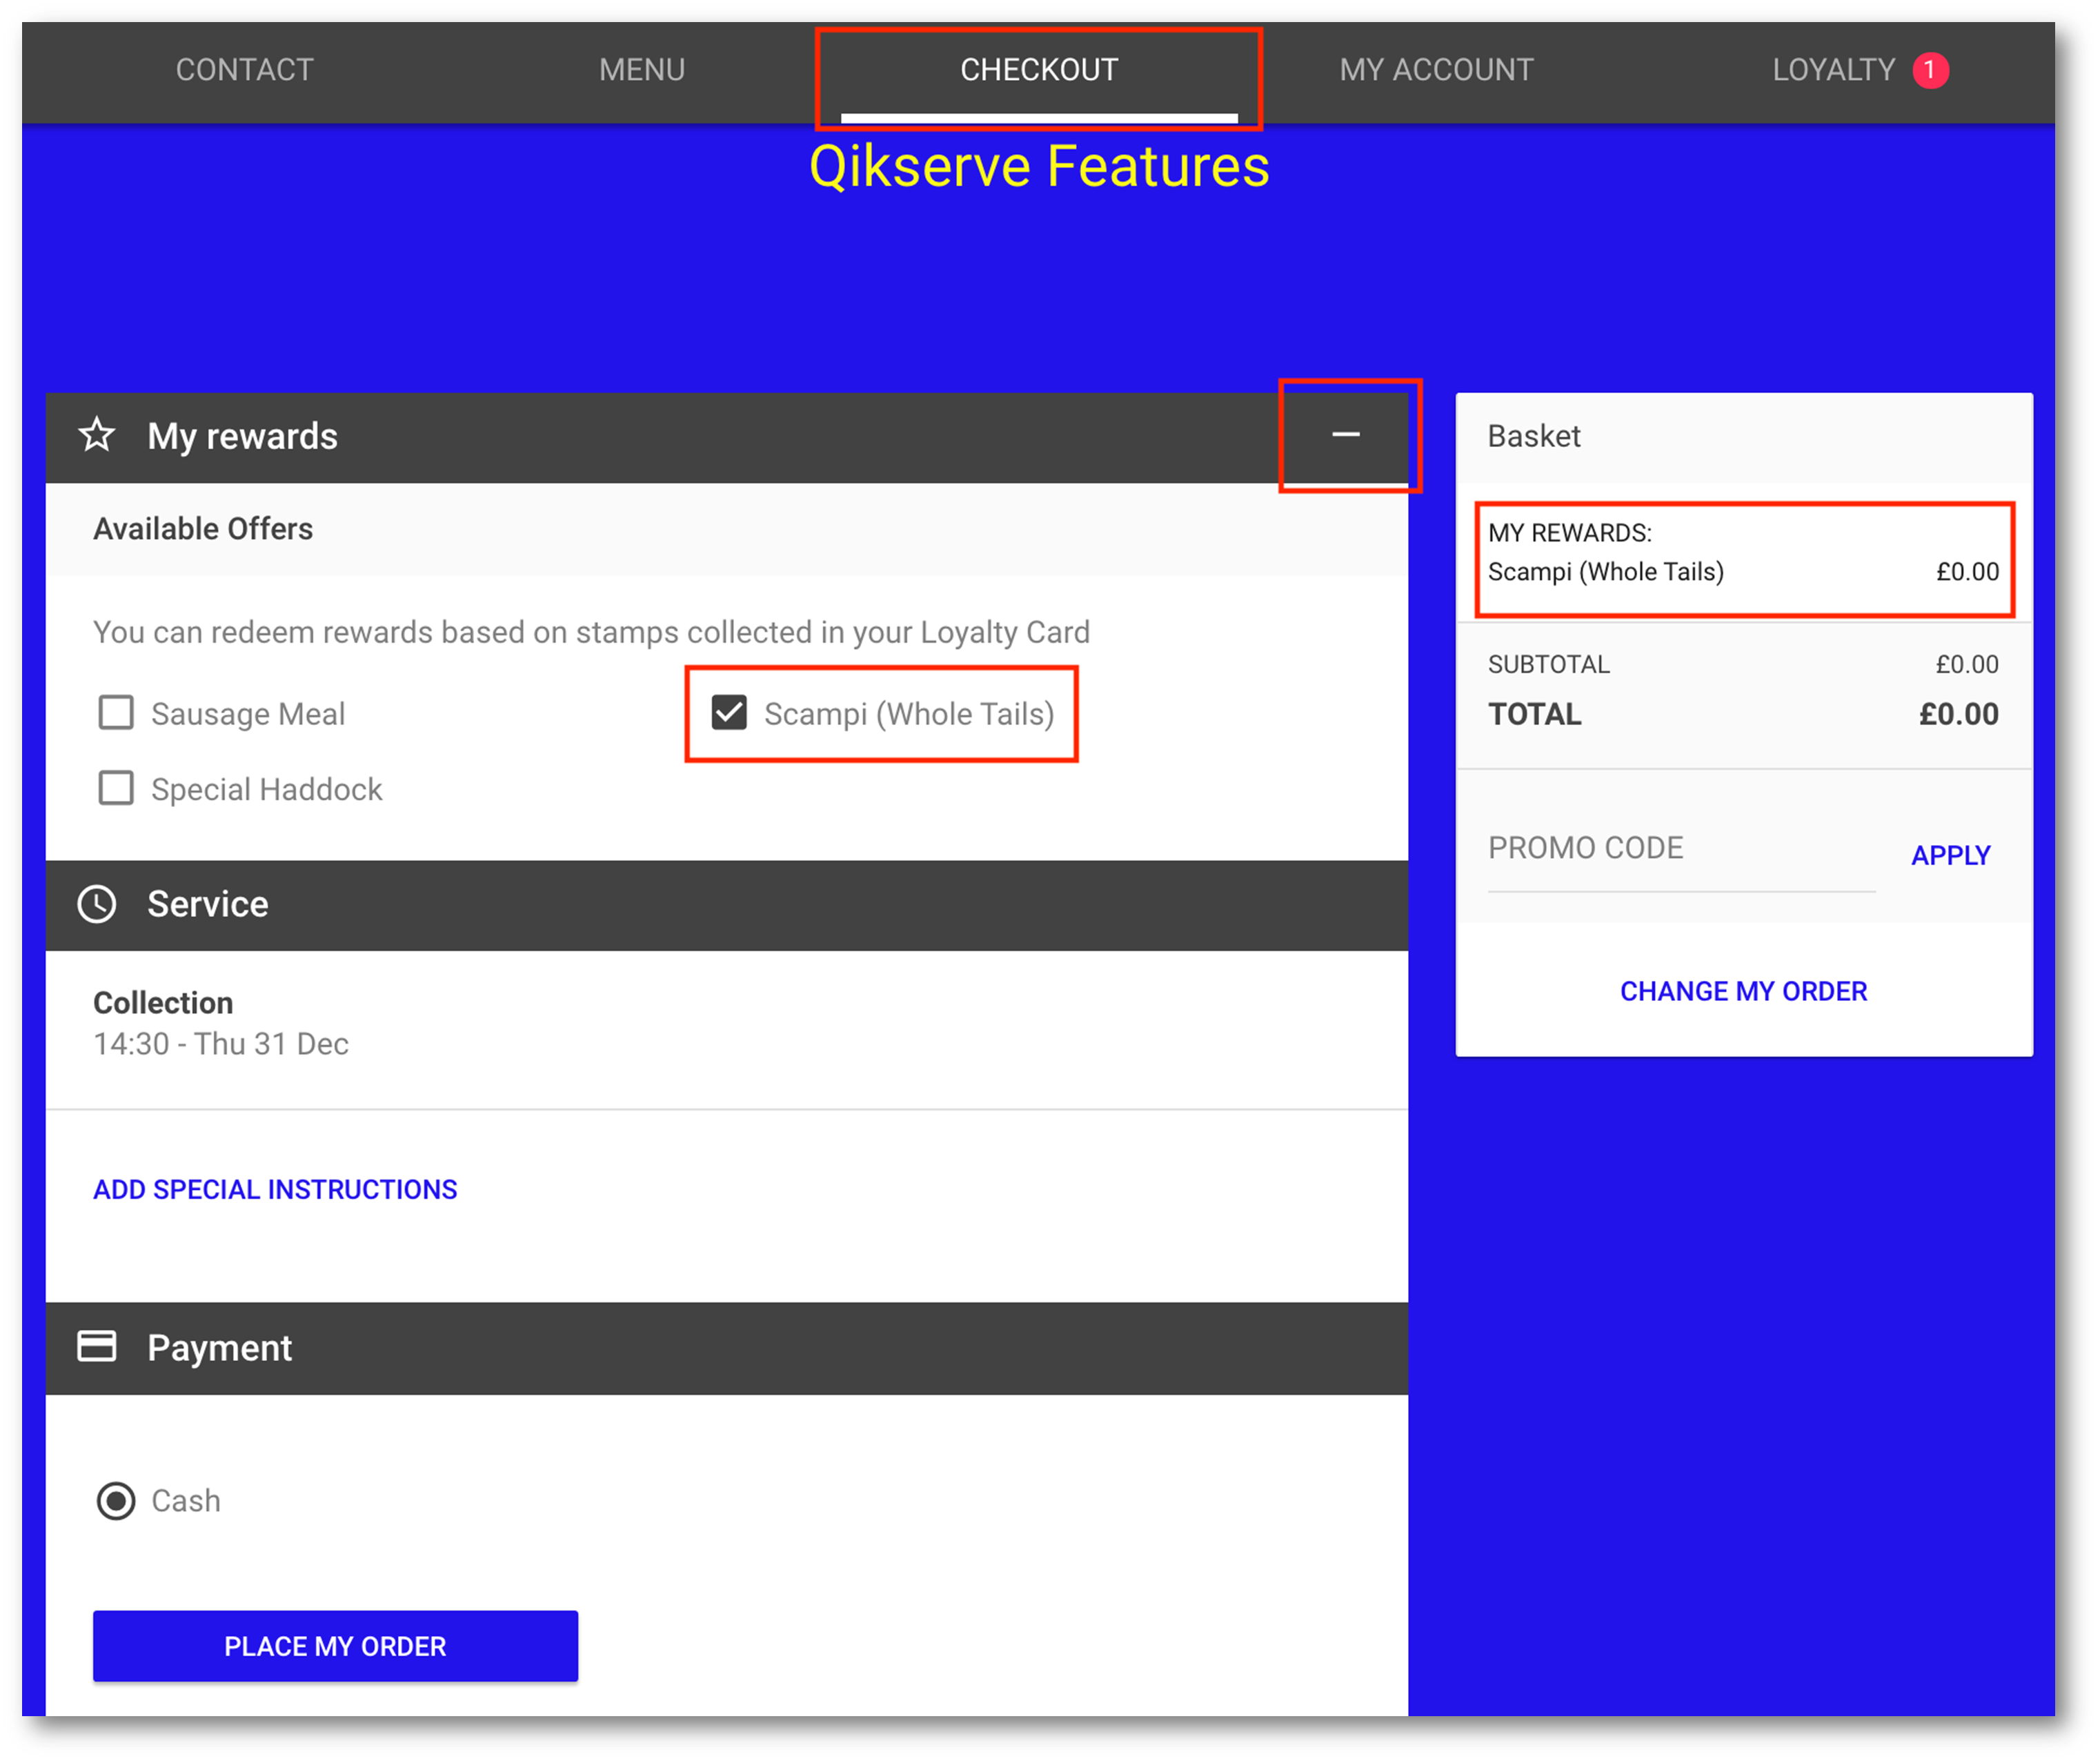
From here they can go straight to the Checkout section of the ordering page and claim their reward. If the reward is an item then they will see all the items you created, tagged and hid to choose from
...
How to display your Loyalty Stamp Card offering on the menu
Go to your Dashboard
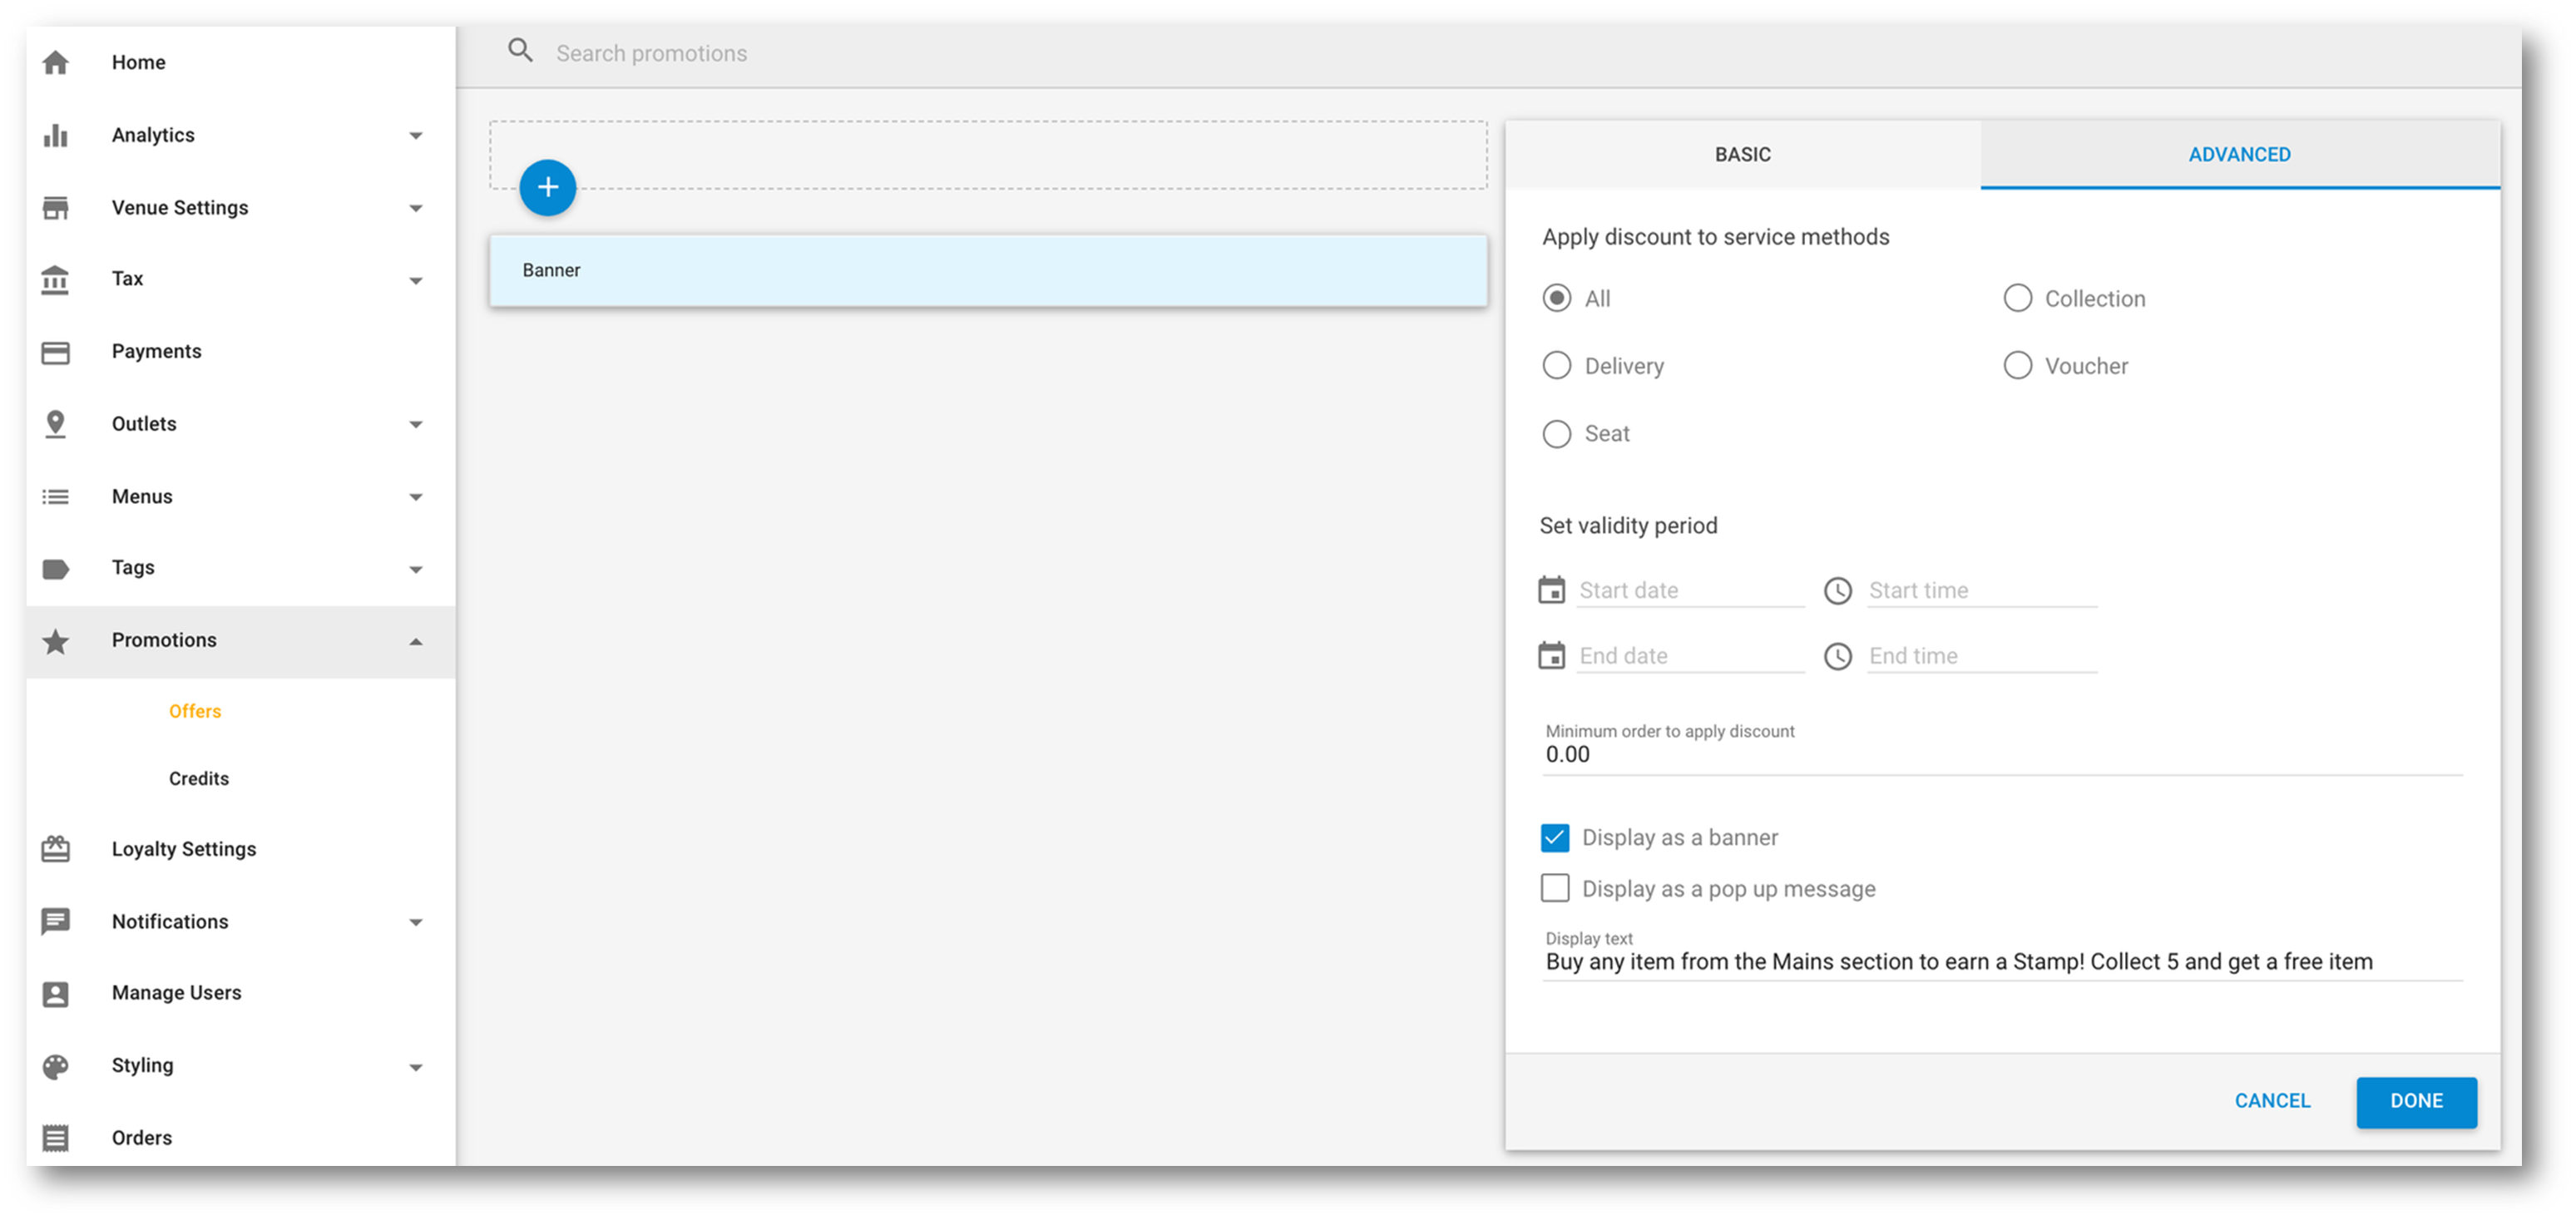
Go to Promotions
Give your promotion a name such as ‘promo banner’ and a value of £0
Go to the Advanced tab
At the bottom of the section click 'Display as banner'
Add your loyalty card text here
Click Done
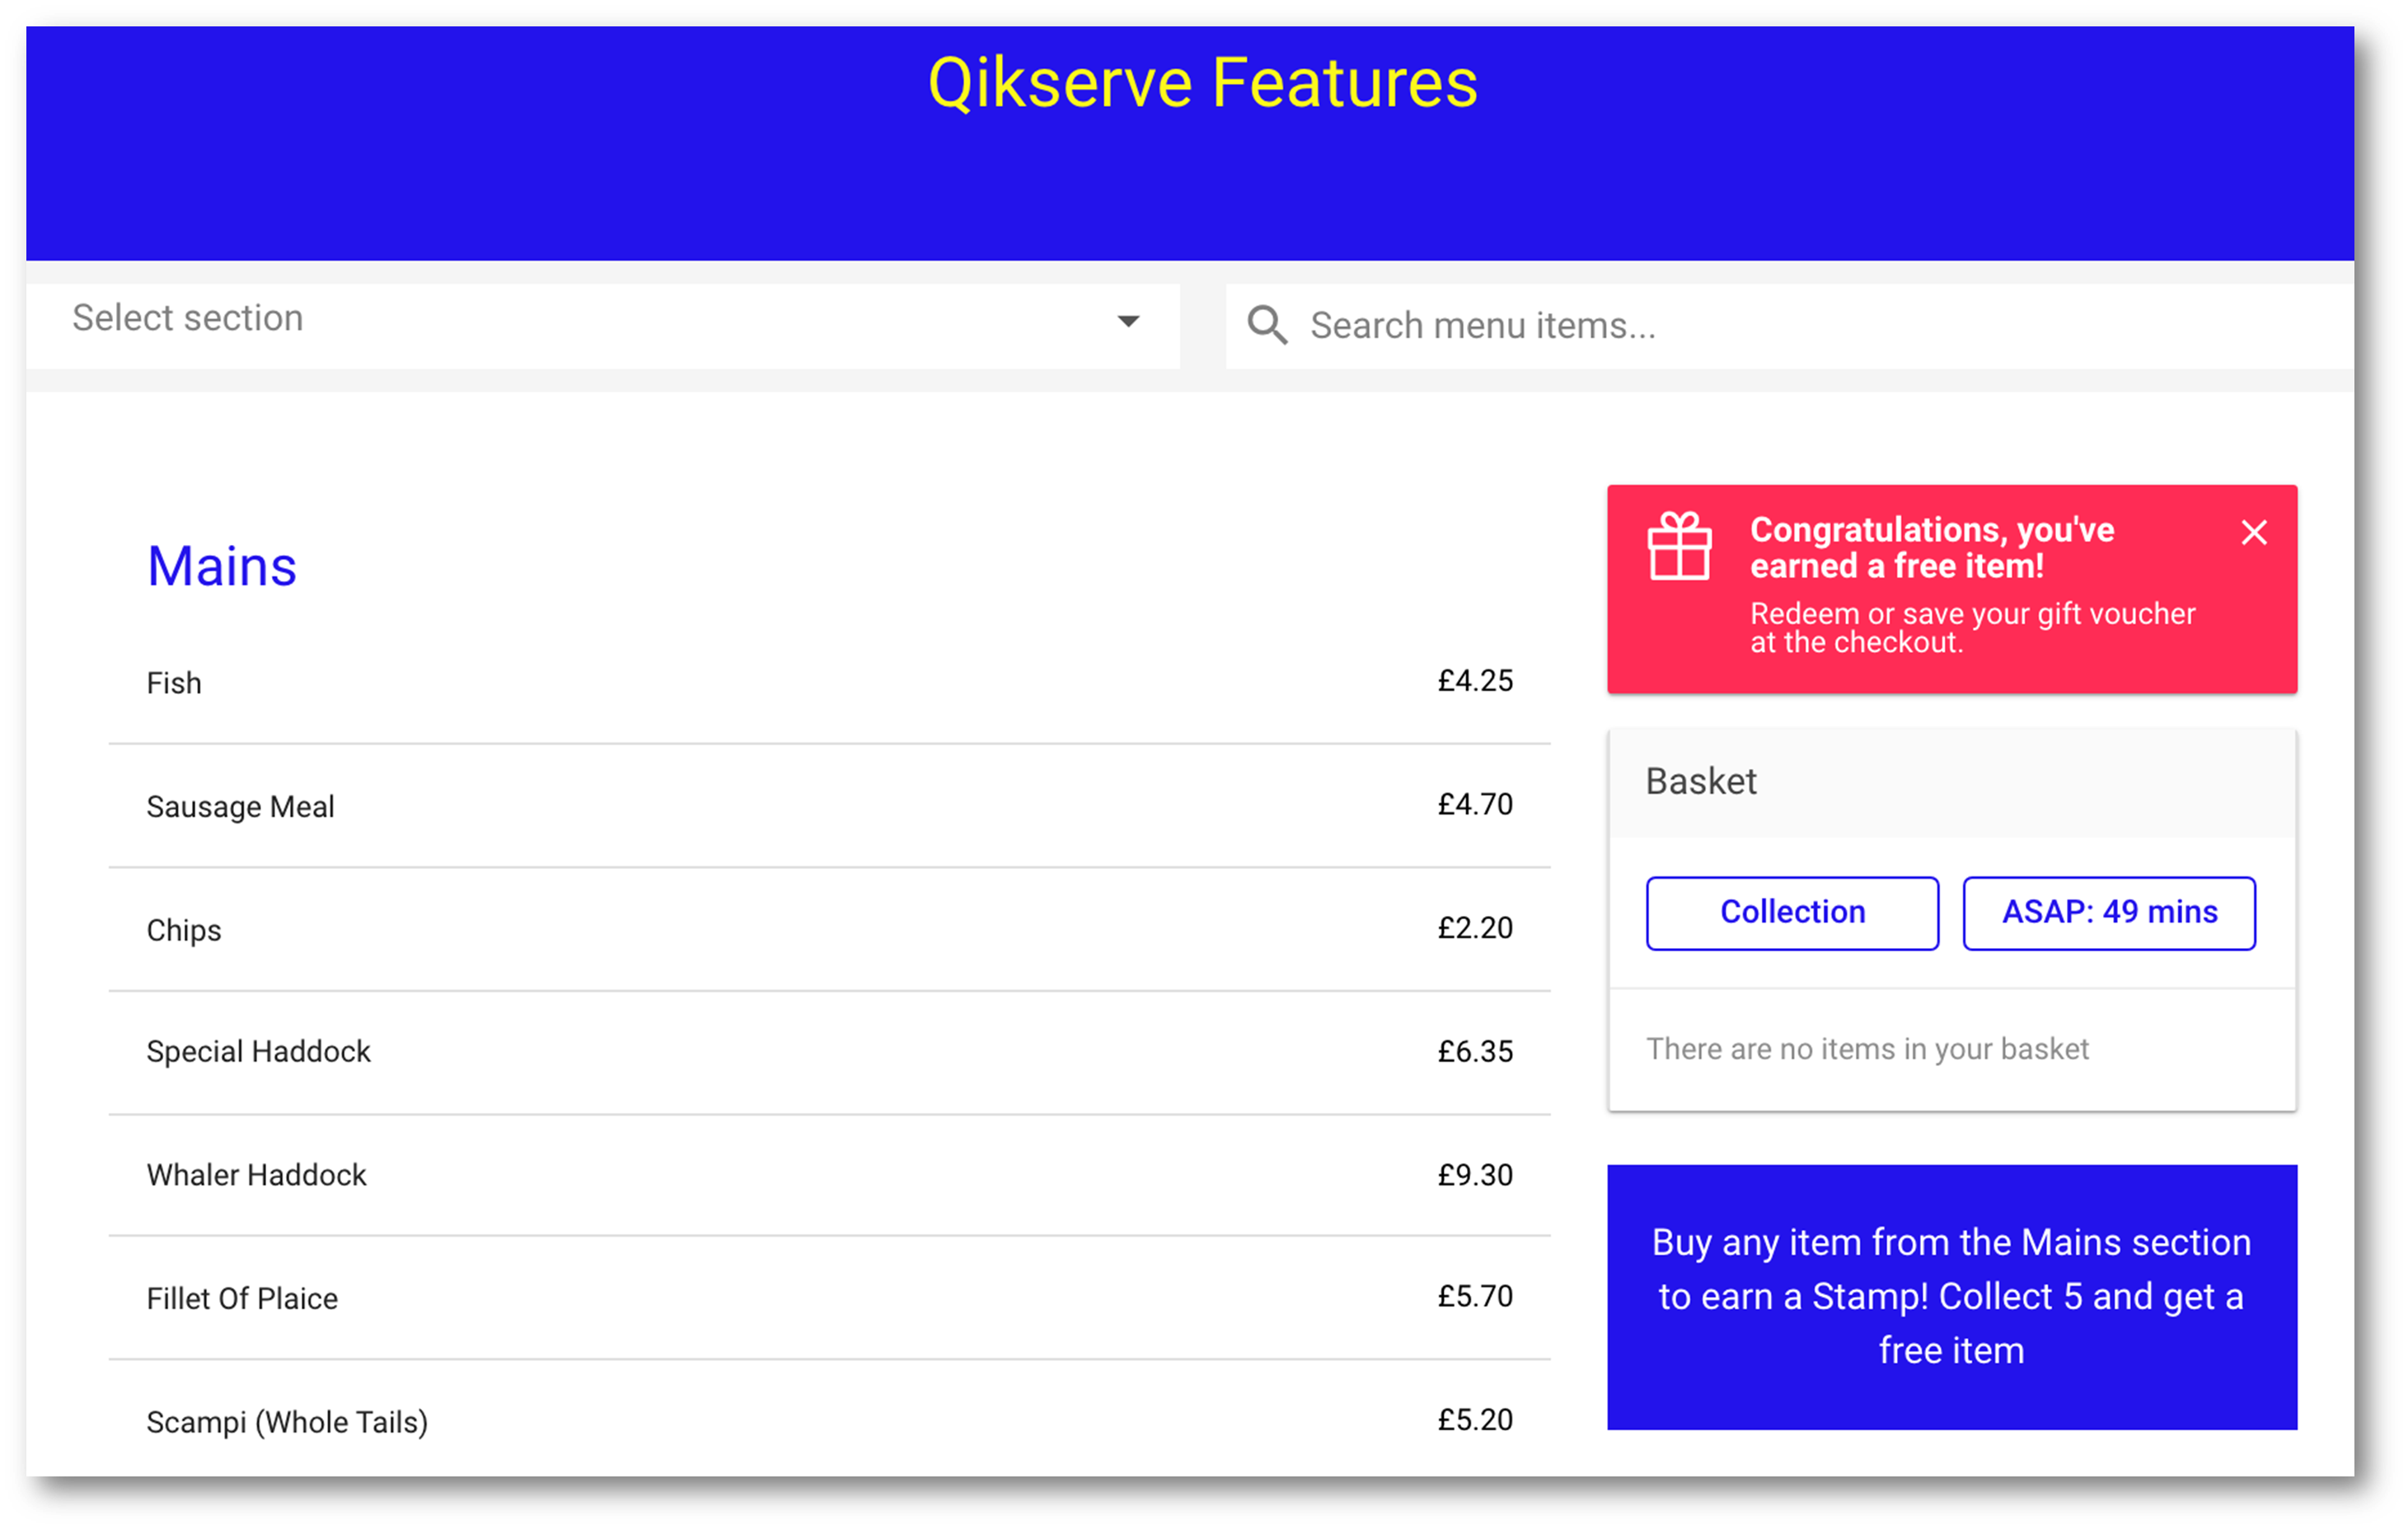
For customers looking at the menu of your ordering page they will now see this message
Lastly, on your Dashboard go to Styling > Loyalty to change the colours and background image of your Stamp cards if you would like to
...
Customers current card (previous Loyalty stamp card reward) will change from the below -
...
To the new loyalty reward (it will keep the same amount of stamps) but the reward will update–update
...
Once their current stamp card is full and the reward has been redeemed, they will then receive the new Loyalty reward as their next stamp card.
...
3. Existing stamp cards keep both the total number of stamps required, and the number of cards accumulated so far.
...
You can filter your reporting by
Date range, having several options or a custom date -
Report, redeemed or unredeemed stamps -
You can also export this repot to a CSV file by selecting the 3 dots at the right side of the report.
...








.png?version=3&modificationDate=1609420207677&cacheVersion=1&api=v2)
.png?version=1&modificationDate=1609420094306&cacheVersion=1&api=v2)
.png?version=1&modificationDate=1609420171771&cacheVersion=1&api=v2)
.png?version=1&modificationDate=1609420324010&cacheVersion=1&api=v2)
